DIY Warm white LED lamp PAR measurements, not so exciting after all!

If you read my last few posts about DIY LED lamps built using 150W warm white LED cobs (which do not require an independent driver) you might have been excited by some of my claims. I previously stated that you could probably get around a 1000W HPS equivalent using just two of these lamps, which meant an energy saving of around 60% relative to the HPS equivalent. However to really verify these claims I wanted to get new PAR and lux meters to perform proper PAR and lux measurements. The results my friends, are disappointing.

Previously I thought that these lamps were close to half of an HPS equivalent based on initial lux measurements. At the same distances, directly below the lamp, I could get around half the lux equivalent of your average HPS lamp, I thought from the warmer spectra of these white warm cobs that the PAR contribution would be significantly higher than that of a regular HPS but it seems that – due to the inefficient use of a white phosphor to produce the spectra – basically the PAR efficiency is equal to that of an HPS lamp.

The PAR (Photo-synthetically Active Radiation) basically measures the number of photons that can be used in photosynthesis that you get per square meter per second off a given light source. I will write a more in-depth post about PAR in the future, but it basically tells you the plant-usable photon flux you get. It is therefore measured in umol*s-1*m-2.

I performed classic PAR measurements with a 150W lamp 15 inches above a target center with measuring points around a 4 square feet area (to compare with the variety of HPS measurements you can find here). The results, in the first image in this post, show you the map of PAR values across the 2 feet by 2 feet area. This shows that the lamp is basically giving you 1466 umol*s-1*m-2  per 1000W at its highest point, which is below the PAR/watt of even the poorest HPS models. With this lamp model using 150W cobs you will therefore need at least 7 lamps to reach the same equivalent of a 1000W HPS in terms of actual photo-synthetically active radiation.

Not only that but without any focusing or dispersing elements the PAR decay as a function of light distance is much more dramatic than for regular, reflector mounted HPS lights. With all these information it now seems clear that these warm white light LED cobs are NOT a good HPS replacement.

However the idea of the zip tie lamp is not dead! I found out that there are actually “full spectrum” LED cobs that are specifically designed to be grow lights (so basically a combinations of red and blue LED lights). These cobs come in 20, 30 and 50W formats and they should have a much more favorable PAR than the 150W warm white LED cobs. I have now ordered some of these cobs (here) to rebuild my zip tie lamp and see if I can indeed get a much better PAR/watt and watt/dollar compared with normal HPS lights.


Cheap DIY high power LED grow lights: Introducing the Zip-tie lamp

Make sure you also read this post, where I studied the PAR of these lamps and realized they are not as good as I thought!

Several months ago I wrote a post about using high power LED cobs that do not require an external driver in order to build a high power DIY LED lamp. However I hadn’t built a practical lamp using these cobs at that particular point in time so I just gave a general idea of why I would use these diodes and how the particular lamp setup would work. Today I want to talk about how to build one of these lamps in practice using an aluminum heat sink, a 150W warm white LED cob, a fan and some zip ties. The setup lacks the use of any adhesives and should provide you with roughly a 40-50% equivalent of a 1000W HPS. With two of these lamps you should be able to run the equivalent setup to 80-100% of a 1000W HPS in terms of PAR with around 60% less power consumption.

The idea of this post is to help you build a very affordable DIY lamp. However please note that this lamp involves work with mains voltages which are dangerous. Please familiarize yourself with all the precautions needed when working with high voltages. All the information herein in is provided as-is for educational purposes with absolutely no guarantee, either expressed or implied.

To build this lamp – showed above – you will need these materials (note that if your country uses another voltage you will need to buy the appropriate pieces for the voltage in your country):

Initially I wanted to build a lamp using a high power warm white LED cob by gluing the cob to the heatsinks using a thermally conductive glue. However the problem with this is that these glues very permanently bind the cob to the heatsink so if for any reason the cob fails you would lose the heatsinks because the cob would be bound to them. For this reason I decided to use zip ties instead, which provide an easy way to secure the entire ensemble and allow you to easily replace any failing part rather quickly. I used nylon zip ties but you can also use stainless still ones if you want the setup to be more resilient (although things will be harder to cut if you make a mistake).

To assemble the lamp I basically used 4 zip tie lines two horizontal and two vertical. For the lines that go the width of the heat sink I just had to use one zip tie but for the other two lines – that also go above the fan – I had to use two zip ties for each line (you can connect one zip tie to another to have a larger zip tie). You need to tighten the zip tie very hard to ensure the cob is in direct contact with the aluminum along all its length, you can also use some thermal compound (like the one you use for CPUs) between the cob and the aluminum heat sink for maximum heat transfer. The pictures below show you a bit better how I performed the entire assembly. When putting the fan on top of the heat sinks make sure the airflow is towards the heatsink (flow arrow in the case pointing down) and that the fan can spin freely).

Finally I connected the cob directly to the AC line by soldering the appropriate live/neutral cables to the connectors at the left size of the cob (in the above picture). I then covered the soldered spots with silicon glue to ensure that the connections were as electrically isolated as possible. Make sure you solder as small portion of wire as possible and make sure the wire makes absolutely no contact with the aluminum heat sink or you will have a short. I also soldered the fan cables to the live/neutral as well since the fan can be driven directly by AC as well.

Since you have the zip ties you can also use them to hang the lamp, you can also add screws to the fan screwing ports and use those to hang the lamp from the ceiling. When I turned on this lamp its power consumption was around 220W – measured directly from the wall – meaning that it consumed a bit more power than what was advertised (which is not uncommon for these cobs). Since my voltage is a bit higher than 110V – which is the minimum rating for this cob – I actually get a slightly higher light/heat output than someone using it at a lower voltage. The fan – which takes around 12-15W on its own, also contributes to this consumption level.

When you power on this lamp – image above (sorry about the camera not being able to handle the light intensity) – you’ll immediately notice how the heat sink starts to heat up. I have tested the lamp through 2 hours of continuous operation up until now and the heat sink reached a stable temperature of around the 120°C (~ 250F), the final temperature you reach will of course depend on your ambient temperature and how well you assemble the components. It is however very important for you to test each one of these lamps for 12/24 hours to ensure that they don’t heat up excessively. Nylon will melt at around 220°C so you definitely don’t want your lamp to ever reach even close to that temperature (to be safer you can use stainless steel zip ties). However it is very likely that the LEDs will burn out way before this happens if your temperature rises too far. You can also add a second fan or use a larger heat sink if your temperature is too high.

In the end the setup is extremely simple to build and you can get roughly 40-50% of a 1000W HPS with one of these lamps. With two of these lamps you will run at around 450W which is 55% less power than an equivalent HPS setup. Although heat generation is no joke here, it is indeed much less than the comparable heat output of a 1000W HPS. With a cost of less than 80 USD per lamp you will be able to build these lamps at a far lower cost than the very expensive grow lights you can get online (which can often go for thousands of dollars for a single 1000W HPS equivalent). If you read my earlier post you will notice that I previously thought you needed 4 cobs to reach the equivalent of a 1000W HPS, turns out you only need two 110V cobs running at 120V!

I have made some PAR,  lux and temperature measurements but I want to keep those for a future post where we will look at some of the spectral and thermal characteristics of this lamp vs other lamp types.


Potassium concentration and yields in flowering plants

From the different nutrients that are needed by plants we have known for more than 4 decades that potassium is of critical importance to flowering/fruiting plants. Potassium is one of the most highly limited nutrients in soil due to its high mobility and great increases in yields have been achieved with both potassium fertilization in soil and the use of properly balanced nutrient solutions containing enough potassium in hydroponics. But how important is potassium and what is its ideal concentration in hydroponic nutrient solutions when growing flowering plants? Today we are going to take a look at the scientific literature about potassium and what the optimum levels of potassium for different flowering plants might be in order to maximize yields.

There are many studies in the scientific literature dealing with the effect of potassium on various flowering plants. Earlier evidence from the 1980s pointed to optimum concentrations of potassium being close to the 160-200 ppm range. The book “mineral nutrition” by P.Adams (here) summarizes a lot of the knowledge that was available at the time and shows that for the growing techniques available at the time using greater concentrations of K was probably not going to give a lot of additional benefit.

However newer evidence from experiments carried out within the past 10 years shows that optimum potassium concentration might depend on a significant variety of factors, from which media, other nutrient concentrations and growing system type might play critical roles. For example study on strawberries in 2012 (here) showed optimum concentrations of K to be around 300 ppm for strawberries and the optimum media to be a mixture of peat+sand+perlite (image from this article included above).

Evidence from experiments on tomatoes (link here and image from this article above) also shows that for tomatoes the actual optimum concentration of K might actually be larger under some condition with the optimum in this study in terms of fruit quality and yields being 300 ppm. In this last case the tomatoes were grown using a nutrient film technique (NFT) setup. However there have also been studies under other growing conditions – like this one on reused pumice – which shows that increasing K concentrations to 300ppm can actually have detrimental consequences. In this case tomatoes fed at 200, 290 and 340ppm of K had very similar results when using new substrate but the old substrate heavily underperformed when high K concentrations were used.

Papers published on the effect of different K concentrations in melons (here) and cucumbers (here) also point to optimal concentrations in the 200-300 ppm range and for the optimum N:K ratio to be between 1:2 and 1:3 for these plants. This is probably the reason why you will often find suggested nutritional guidelines for flowering plants – like those below taken from here – mostly suggesting K concentrations in the 250-350ppm range. However you will often find that they directly contradict research papers, like this guideline suggesting K of 150 ppm for strawberries while we saw in a recent paper that 300ppm might be better. This is most probably due to differences in the sources used which might have used different growing systems or plant varieties which responded to other conditions better.

All in all the subject of K concentration in hydroponics is no simple one. Using low K will limit your yields tremendously but increasing your K very high can also harm your plants, especially depending on the type of media you are using. In general aiming for a K concentration between 200-250 ppm is safest but in many cases increases to the 300-400ppm range can bring significant increases in plant yields. A careful study of the available literature and the actual growing conditions that the plants will be subjected to will be key in determining what the best K concentration to use will be. Alternatively carrying out adequately designed experiments under your precise growing environment will help you carry out an evidence-based decision about what K concentration to use.


Five reasons why a dedicated hydroponic testing room is a great idea

Most commercial hydroponic setups completely lack testing environments. The most common reason for this is that commercial crops are meant to produce revenue and a testing environment means dedicating space, time and money into something that might not be as productive as the rest of the production facility. Furthermore a testing room implies that you will need to create a completely independent setup and hire someone who knows how to do research in order to ensure it is both adequate and fruitful. Although many people believe this not to be worth it today I want to talk about the five most important reasons why I consider that a testing room is something incredibly useful to have as a part of your commercial growing facility and why getting one will probably pay off greatly for you going forward.

Testing product changes. Perhaps the first and most direct benefit to having a testing room is to ensure you can test product changes. It may be the case that your supplier for some particular fertilizer product or additive has ran out and you now want to test a new product to replace it. It may also be that you want to test how a product does compared to what you generally use but you don’t know if it does better or worse. Most growers are afraid of change because making facility-wide changes that won’t work could have huge financial consequences. A testing room ensures you can test safely and then roll-out changes slowly without having to risk your entire crop cycle to find out.

Optimizing what you currently have. Change is very rare across commercial facilities because growers understandably want to preserve their current results, even if some better results by making some change would be possible. This constraints growers from making incremental changes that might make their crops significantly more productive. By having a testing room you can optimize the setup you already have by making adequate research into optimizing things such as environmental or nutritional factors.

Trying potentially game-changing modifications from academic research papers. There are many papers published each year on how to increase the yields of hydroponic crops. Some of these papers offer somewhat risky and controversial changes that might not transfer well across species. However if something gives you the potential to increase your yields by say, 50%, it might definitely be worth trying across a testing setup. Obviously these things are too risky to try across an entire facility but a testing room would be perfect to help you try these new and exciting modifications, potentially giving you a huge edge versus all the other people who will never try this.

Try new plant varieties. Usually growers try new plants without having a clear idea of how productive they are going to be under their growing setup. This means that you introduce a new variety with a huge question mark regarding its productivity and potentially financial benefit or cost. A testing room provides you with a risk-free way to test how a particular plant variety will perform under the exact conditions in your facility, potentially allowing you to make far less risky decisions when it comes to making planting changes in your facility.

Image result for hydroponic plant testing room

Research new ideas. A final benefit you can get from a testing room is that you can research your own new ideas. With adequate experimental design even a small room with just 10 plants can be used to test some ideas to see how they affect plant growth. This means that you can develop your own in-house growing modifications that will make it much harder for others to compete with you. For example if you developed a secret foliar additive in your growing facility it would allow you to only use this for your own crops, without the industrial secret ever being used by your competitors.

Of course there are many other advantages to testing rooms but the above are just some of the wonderful things you’ll be able to do if you have a testing room and someone trained in scientific research who can help you design experiments and get the most out of it. A testing room also doesn’t need to be huge and even starting out with 10 plants can be a huge step in taking your commercial growing facility to the next level.


The use of phosphites in plant culture

Plants normally get most or all of their phosphorous from inorganic phosphorus sources. Most commonly these sources are monobasic or dibasic phosphate ions (H2PO4 and HPO4-2), which are naturally formed from any other phosphate species at the pH values generally used in hydroponics (5.5-6.5). However these are not the only sources of inorganic phosphorous that exist. Phosphite ions – which come from phosphorous acid H3PO3 – can also be used in plant culture. Today we are going to talk about what phosphite does when used in hydroponics and why it behaves so differently when compared with regular phosphate sources. In research P from phosphate is generally called Pi, so I will follow this same convention through the rest of this post. A good review on this entire subject can be found here.

The role that phosphite (Phi) plays in plant nutrition and development has now been well established. Initially several people claimed that Phi was a better P fertilizer than Pi so researchers wanted to look into this to see if Phi could actually be used as an improvement over Pi fertilization. However research was heavily disappointing, studies on lettuce (here) , spinach (here), komatsuna (here) as well as several other plants showed that Phi fertilization provides absolutely no value in terms of P nutrition, meaning that although plants do absorb and process the Phi it does not end up being used in plant tissue to supplement or cover P deficiency in any way. Furthermore there are some negative effects when Phi is used in larger concentrations (as those required for Pi) so it quickly became clear that Phi is not a good fertilizer at all.

Why should anyone use Phi then? Well, research started to show that some of the earlier positive results of Phi fertilization were not because it was covering Pi deficiencies but mainly because it was offering a protective effect against some pathogens. Research on tomatoes and peppers and other plants (here and here) showed that phosphites had some ability to protect plants against fungi with plants subjected to Phi applications showing less vulnerability to the pathogens. However the evidence about this is also not terribly strong and a few papers have contested these claims.

Those who say that Phi is not mainly a fungicide claim that positive results are mainly the effect of Phi acting as a biostimulant (here). These groups have shown through research across several different plant species, including potatoes, onions, lettuce, tomatoes, wheat, oilseed rape, sugar beet and ryegrass that foliar or sometimes root applications of phosphites consistently yield some positive effects, meaning that there is a strong biostimulant effect from the Phi that is not related to either P nutrition or a fungicidal effect. A recent review looking at the overall biostimulant effects of Phi (here) shows how researchers have obtained evidence of biostimulation in potatoes, sweet peppers, tomatoes and several other species (the images in this post were taken from this review). The different studies mentioned in the review show increases in quality and even yields across these different plant species (see tables above).

While we know that Phi is not a good source of P nutrition and we know it can help as a fungicide in some cases it is clear now that under enough Pi nutrition Phi can provide some important biostimulating effects. Negative effects from Phi seem to be eliminated when enough Pi nutrition is present so rather than be thought of as a way to replace or supplement P nutrition it should be thought of as an additive that has a biostimulating effect. Phi may become a powerful new tool in the search for higher yields and higher quality, while not serving as a replacement for traditional Pi fertilization.


Five things you should know when mixing your own hydroponic liquid nutrients

Many hydroponic growers – especially large scale ones – can benefit greatly from mixing their own custom nutrients. Not only can this save money in the thousands of dollars per month but it can also give you an unprecedented degree of control when compared with store-bought nutrients. On today’s post I am going to write about five important things you should know when mixing your own nutrients so you can avoid many common problems that can arise when you start preparing your own stock solutions.

More concentrated solutions are not always better. When you prepare a concentrated liquid you would usually want to go with the highest possible concentration factor so that you can prepare as much final nutrient solution as possible with as little stock solution as possible. However trying to get into higher concentration factors (1:400-1:500) can cause important issues due to the solubility of the salts used and the temperatures the stock solution will be exposed to. It can also cause high inaccuracies with variable injector setups since the dilutions will be much smaller. For starters go with a 1:100 concentration factor and only start going higher when you get more experience. If you’re using injectors I would generally avoid a range higher than 1:250 unless you do more extensive calibration procedures with your injectors.

Impurities can cause important problems. Some salts can come with significant levels of impurities – sometimes mainly additives – that can cause substantial issues when preparing your nutrient solutions. Lower quality grade salts – mainly those used for soil fertilization or those that are OMRI listed and come straight from mining with no refining – can generate problems within your mixing process. These problems range from insoluble left-overs in tanks to toxic amounts of some micro elements. To ensure you get the best possible results use greenhouse grade fertilizer salts and try to avoid sources of salts that are OMRI listed. Synthetic sources that have been heavily purified are your best bet in ensuring the best possible results.

Use slightly acidic deionized water to prepare the solutions. Most water sources in Europe and the US are very heavy in carbonates an therefore inappropriate for the preparation of concentrated nutrient solutions as these ions can cause salts to precipitate when preparing concentrated solutions. To fix this issue the best thing would be to use distilled water but – since this is often not an option – the next best thing is to use reverse osmosis water and add a bit of acid (0.5mL/L of nitric acid, other acids may cause other problems) per gallon of concentrated solution. This will ensure that everything gets dissolved and will eliminate the carbonates that can be naturally present within the water. Of course never, ever use tap or well water to prepare concentrated hydroponic solutions.

Salts take up volume, take that into account. A very common mistake when preparing solutions is to just add the salts to the final volume of desired stock solution to prepare. This is a mistake since the salts also take up volume. If you want to prepare 1 liter of concentrated solution and you need to add say, 100 g of potassium nitrate,  adding 100g of potassium nitrate to 1L of water would generate a solution with a final volume greater than 1L. To avoid this problem always add the salts to half the volume of water and, after the salts have dissolved, complete to the final volume of desired solution.

Add salts from the smallest to the largest quantities. When you prepare hydroponic solutions it is often better – especially when you’re starting – to add salts from the smallest to the highest amounts needed. If you make a mistake at some point then you will minimize the amount of mass of salts that has been wasted due to this fact. If you make a mistake adding a micro nutrient you will only lose a small amount of the other micro nutrients instead of losing a huge amounts of macro nutrients due your order of addition. It is also true that the substances that are added in largest quantities are commonly  nitrates and these salts have endothermic dissolutions – meaning they cool solutions upon addition – so it is better to add them last so that they can benefit a bit from the heat generated by the dissolution of the other salts.

The above is not an exhaustive list of pointers but it should save you from some important trouble when preparing your own initial nutrient solutions.Although some of these points may seem obvious to those that have experience preparing their own solutions they may prove invaluable to those who are just starting their journey in concentrated nutrient preparation.


Humic acids in hydroponics: What is their effect?

Plants and microorganisms affect the substrates in which they grow in many ways. If you start growing plants in an inert substrate – with nutrient applications of course – you will notice that the substrate’s chemical composition will start to change with time and it will start to get enriched in carbon containing substances. As plants and microorganisms grow, thrive and die, some of the chemicals that made up their cells end up enriching the substrate they grow on. This process – whereby organic materials from living organisms become part of a substrate – is what generates the soils around us. One of the most prevalent class of components in this organic material, is what we call humic acids.

Humic substance chemical properties.

Humic acid is not a single substance but a wide range of substances that are created as a product of plant and microorganism decomposition. This is why you often hear people talk about “humic acids” instead of simply “humic acid”. They are called “acids” because the humic substances contain molecules that have groups that resemble those found in phenol and vinegar. They are also differentiated from fulvic acids in the fact that they are only soluble at basic pH values while fulvic acids are generally small enough molecules to be soluble across most of the pH spectrum. Since humic acids are a very important component of enriched soils and can be used in soiless culture, people have started using them as supplements in soiless and pure hydroponic culture.

When talking about the effects of humic acids it is worth mentioning that since we’re talking about a group of molecules – not a single substance – effects are generally dependent on the source of the humic acid used. For example you can find a study on tomatoes here where two different sources of humic acids – from peat and leonardite – were used to grow tomatoes. The study shows a clear difference between both with the first only stimulating root growth while the second stimulated both roots and shoots. However in both cases there was an increased iron availability to plants, although the mechanism for this was not established.

Tomato plants inoculated with root rot at different humic acid application rates

In plants like gerberas humic acids applied at 1000 ppm can offer increases in harvested flowers of up to 52% (see here), somewhat positive effects can also be seen in tomatoes across the literature with most studies showing increases in yields and mineral contents (see here), reports of positive effects on gladiolus have also been published (here). Since the 1990s there has been a somewhat established understanding of some general beneficial effects for humic acid applications, it is well established that they can prevent and eliminate micro nutrient deficiencies due to their abilities to increase their availability(see here). The literature is also quite consistent in that the largest effects are often seen on root growth rather than on shoot growth or mass. There are however some types of humic acids that have showed higher increases of shoot mass, for example in an article studying humic substances derived from municipal waste on barley this was the observed effect. For some plants however – despite these beneficial effects – increases in yields in hydroponic culture are not evident (see here and here). A look at the effect of a humic acid source on several different plant species can be found here.

Effect of humic acid, bacteria and lactate applications on tomato plants.

It is worth noting that humic acid applications are also not limited to the root zone. Since humic acids can enhance the absorption of some nutrients they can also be applied in foliar sprays. Experiments on strawberries (here) showed that an application of 1.5-3ppm of humic acids led to an increase in the quantitative and qualitative properties of the fruits.  Combinations of humic acids with other biostimulants are also common. For example a combinations of lactate, humate and beneficial bacteria was tested on tomatoes (here) but the experiments showed that the effect could be stimulating or inhibiting depending on the particular conditions, even though most combinations were beneficial.

With the high variability between humic substance origins, application rates and effects it is very hard to say whether humic acid applications will definitely help your crops in terms of yields. For almost all humic acid sources it is probably warranted that micronutrient absorption will be somewhat augmented due to their ability to chelate these nutrients, but only if the nutrients are not efficiently chelated already. This sole ability might lead to crop improvements if deficiencies are present but improvements in yields will strongly depend on humic acid substance origin and particular properties. However humic acids do seem to lead to general product quality improvements and since negative effects are rare there seems to be no harm in carrying out field tests to determine if their use is worth it for your particular crop.


How to prevent problems with powdery mildew in hydroponic crops

One of the worst problems you can get in a hydroponic crop is mildew. Year after year I see growers lose significant amounts of production due to this disease within a variety of different crops. Powdery mildew reduces yields, stunts plants and – if contracted early on – will possibly cause a complete loss of your crop. It is generally hard to control once it gets in and it will expand like wildfire through any commercial growing operation. Today we will be discussing how to actually prevent mildew from ever appearing – without using toxic fungicide applications – and why prevention can play a huge role in ensuring you never have to face this problem in the first place.

Fungal spores are generally carried by the wind and by insects, making it very hard for a crop to avoid ever coming into contact with the pathogen. Wild plants or plants from other commercial crops close to you will most likely have the disease and millions of spores will get in the air and eventually reach your plants. It is only a matter of time till the powdery mildew reaches your crops – almost impossible to prevent – so you must make sure that your plants are strong enough to prevent the pathogen from taking hold.

There are two main factors that affect whether powdery mildew will infect your plants. The first is plant strength and the second is the environment. If one of these two is not at its best then your plants will fall prey to this fungal disease. Neither strong plants under bad environmental conditions nor weak plants under ideal environmental conditions will be safe from the disease. So what can we do to ensure our plants are healthy and our environmental conditions are safe?

One of the proven methods to make plants strong against fungi is silicon. Potassium silicate applications – as soil drenches or foliar sprays – have proven to increase disease resistance across several studies (see here and here for examples). But other innovative approaches using other forms of silicon – for example nanometer sized silica crystals – have also yielded good results. In this and this studies it was clearly shown that other forms of silicon – besides silicate – could also help in preventing fungal disease. This might be preferred in some cases as these forms of silicon can be far more stable and easier to store/apply compared with options like potassium silicate.

However silicate applications are no miracle. If your environmental conditions are not set properly the silicate applications will be useless. This is the reason why some growers say that silicate does nothing against disease, because an environment that’s favorable for fungi can basically nullify the protective action of supplemental silicon. This was demonstrated by cucumber growers who had a lot of success with Si supplementation in Canada to prevent fungal diseases, but failed to reproduce this success in Florida. A study about this difference revealed that the higher temperatures in Florida negated a large part of the benefits from silicon supplementation. If you want silicon to work against disease better stay in the 20-25°C range.

Other microorganisms can also be of great help in preventing powdery mildew. If a leaf is already colonized by beneficial fungi or bacteria it will be much harder for a pathogen to get in. Several species of microorganisms have been studied in this regard. Fungi like Tilletiopsis have shown to prevent and control the disease (see here), other microbes have also been studied in conjunction with silicon (see here and here), showing beneficial effects. Fungus like Trichoderma harzianum and bacteria like bacillus subtilis have also shown induction of systemic resistance against fungal diseases (see here, here and here).  The two images above were taken from this study.

Friendly chemical solutions are also available for the prevention of powdery mildew. Plant derived extracts, for example neem seed oil at 1% has shown to be a good agent for powdery mildew prevention in okra (see here). Substances like salicylic acid have also shown to trigger resistance to powdery mildew in plants like peas (see here).

There are also additional alternatives dealing with the environment that can make it difficult for fungi to colonize plants by attempting to make the environment more hostile for fungi. Spraying ozonated water has shown positive results in experiments with tomatoes (see here) as well as electrolyzed water in strawberries (see here). Keeping the environment conditions within a proper range is also important, this paper shows you how environmental conditions affect powdery mildew disease severity in sunflower but the general features are applicable to most higher plants. As you can see in the image above – taken from this paper – disease severity increases with relative humidity. In general you will want to keep your relative humidity below 70% to avoid making the environment extremely friendly for fungi.

In the end there are many things you can do to keep your plants free of foliar fungal disease like powdery mildew. Use lower temperatures, control your relative humidity, do silicate and salicylic acid applications and use beneficial microbes. If you follow these steps you will forget that powder mildew ever existed!


Five important things to consider when doing foliar spraying

Foliar spraying is a true and tested way to increase yields and prevent issues in plant culture. Both soil and hydroponic growers have used foliar fertilizer applications to increase yields and prevent problems due to nutrient deficiencies during the past 50 years. However there is a lot of mystery and confusion surrounding foliar fertilizer applications, reason why this technique is often applied incorrectly or sub-optimally. Today I want to talk about 5 key pieces of information to consider when doing foliar fertilization so that you can be more successful when applying it to improve your crop results and reduce deficiency problems. If you want to learn more about these factors I suggest you read the following reviews on foliar feeding (here, here and here). Second table in this post was taken from this study on wheat.

Image result for foliar spray

Foliar fertilization is not root fertilization. A usual problem when doing foliar fertilization is to think that the same products can be used for leaves and roots. When you want to increase your crop yields using foliar fertilization you should definitely not use the same products and concentrations you use for soil. There are for example some chemical substances that you would never want to apply to the roots that have actually shown to give better outcomes in leaves. A good example is calcium chloride which is a huge mistake in root fertilizers but a great choice when doing foliar fertilization.

Foliar fertilizers should generally be much more concentrated. When people apply foliar fertilization they usually apply much lower concentrations because they are afraid of burning leaves. Although this can certainly happen if the foliar fertilizer is badly designed research has shown that the best results are obtained with much higher concentrations than what you generally use for the roots. For example when you apply an iron foliar fertilization regime you generally use a concentration of 500-1200 ppm of Fe while in root applications you only very rarely go beyond 4-5 (most commonly 1-3 ppm). Usually concentrations in foliar fertilizers will be much higher and if the fertilizer is correctly designed this will give much better results. The graph below (taken from the first review linked above), shows some of the most commonly used fertilizer concentrations.

Surfactants are very important (don’t use dish washing soap!). Leaf coverage is very important in foliar applications because you want the fertilizer to be evenly spread across the entire leaf not “clumped” into drops due to surface tension. Many people have trouble with nutrient burn due to bad fertilizer design that causes inadequate leaf coverage. However all surfactants are not created equal and ionic fertilizers are very undesirable for this task due to their interaction with leaf tissue and fertilizers. Due to this reason you should NOT use something like dish washer liquid soap but a proper non-ionic surfactant like a polysorbate. The surfactant will be a very important part of your foliar fertilizer formulation.

Timing is also critical. The time when you do your foliar sprays applications is also very important for optimal results. In general you want the leaf stomata to be open and the vapor pressure deficit to be lower so the best time to do foliar spraying is usually during the afternoon after temperatures have dropped significantly. For most time zones this usually means sometime after 3PM. Doing foliar applications sooner can lead to much larger stress due to a higher vapor pressure deficit – risking burns as well – while doing it later leads to less efficient absorption due to the stomata being closed. If applying the spray at this time is not possible then early morning often works as well. Make sure you measure your daily temperature/humidity fluctuations to ensure you don’t do foliar sprays at a high VPD.

Image result for foliar spray yield

Couple adequate additives for yield increases. Research has shown that while nutrient foliar spraying can enhance yields significantly under sub-optimal root feeding conditions if the root concentrations are already optimal – as in a well managed hydroponic crop – it is hard for simple nutrient foliar spraying to provide a lot of benefit. However there are several biostimulants that are poorly absorbed through the root zone that can give you much better results when used as foliar sprays. Additives like salicylic acid and triacontanol can make sure that your nutrient foliar spray gives you maximum additional benefits.

As you can see there is a lot to the design of an adequate foliar spray. You must consider that the substances you use need to be fit to the purpose – not necessarily the same as for root applications! – and that your concentrations, surfactants, additives and application times are adequate. Now that you are aware of these factors you should take them into account when designing your next round of foliar spraying for your crops.


Creating a robust pH/EC monitor for hydroponics using Atlas probes and an Arduino

A few months ago I talked about how you could build a simple sensor station for your hydroponic projects using an arduino (see here). However this small project used the relatively cheap – but I have found not very robust – pH/EC probes and boards from gravity which makes it a poorer choice for a more professional project aiming to constantly monitor the pH/EC of a production hydroponic setup. Today I am going to tell you how you can build a dedicated pH/EC monitor using the robust pH probes from Atlas, which also have several important advantages we will be discussing within this post. I would also like to point out that Atlas is not paying me anything to write this post, I write just because of my experience using their probes.

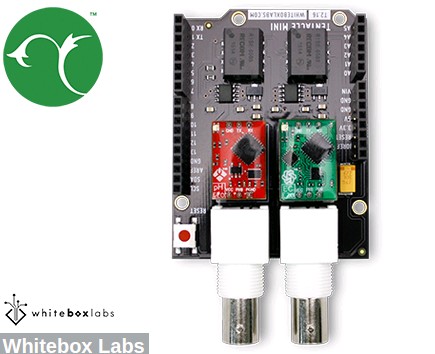
The pH/EC probes from gravity have several problems when looking for a robust sensing setup. The first issue they have is that the probes are not rated for constant immersion, so they are damaged if you place them within solution the whole time which is probably what you want to do within a production hydroponic setup. The second issue is that the boards require cable connections to the Arduino which introduces a significant amount of noise that can causes problems with measurements. Due to poor isolation there can also be issues with the gravity boards when measuring EC/pH at the same time. To overcome these issues we can use probes and boards from atlas which have the advantage of having no cable connections to the Arduino – connections are through pins directly – plus the probes are rated for constant immersion and are much more robust. These are the things we would need to build this project:

As you notice this sensor project is much more expensive than the sensor station I had discussed before, with a price tag of around 490 USD (not including shipping). However when looking for a robust setup you definitely should favor the additional expense as this will likely be paid off with much longer service times.

When you get the pH/EC kits the first thing you want to do is change your EZO boards (the small circuit boards that come with them) to i2C mode so that you can use them with your mini tentacle shield. To do this follow the instructions here, follow the instructions in the “Manually switch between UART and I2C” section, use female jumpers to make this process easier. Note that you can use your LCD shield analogue 5V and ground pins when you need power within the process.

//Libraries
#include <U8glib.h>
#include <stdio.h>
#include <Wire.h>
#include <Arduino.h>

#define TOTAL_CIRCUITS 2  

///---- variables for pH/EC tentacle shield ------- //

#define TOTAL_CIRCUITS 2   

char sensordata[30];                  
byte sensor_bytes_received = 0;       

byte code = 0;                        
byte in_char = 0;  
int channel_ids[] = {99, 100} ;                   
   
// ------------------------------------------------ //    

// EC values // CHANGE THESE PARAMETERS FOR EC PROBE CALIBRATION
#define EC_PARAM_A 0.00754256

//pH values // CHANGE THESE PARAMETERS FOR PH PROBE CALIBRATION
#define PH_PARAM_A 1.0
#define PH_PARAM_B 0.0

#define XCOL_SET 55
#define XCOL_SET2 65
#define XCOL_SET_UNITS 85

//--------------------------

U8GLIB_NHD_C12864 u8g(13, 11, 10, 9, 8);   
float pH, EC;

//--------------------------

void draw() {
  u8g.setFont(u8g_font_04b_03); 
  
  u8g.drawStr(0,11,"pH:");
  u8g.setPrintPos(XCOL_SET,11);
  u8g.print(pH);
  
  u8g.drawStr(0,21,"EC:");
  u8g.setPrintPos(XCOL_SET,21);
  u8g.print(EC);
  u8g.drawStr( XCOL_SET_UNITS,21,"mS/cm" );
  
}

void read_tentacle_shield(){

  for (int channel = 0; channel < TOTAL_CIRCUITS; channel++) {      
  
    Wire.beginTransmission(channel_ids[channel]);     
    Wire.write('r');                         
    Wire.endTransmission();                       
    
    delay(1000); 

    sensor_bytes_received = 0;                        
    memset(sensordata, 0, sizeof(sensordata));        

    Wire.requestFrom(channel_ids[channel], 48, 1);    
    code = Wire.read();

    while (Wire.available()) {         
      in_char = Wire.read();           

      if (in_char == 0) {               
        Wire.endTransmission();         
        break;                          
      }
      else {
        sensordata[sensor_bytes_received] = in_char;      
        sensor_bytes_received++;
      }
    }
    
    if (code == 1){
      if (channel == 0){
        pH = atof(sensordata);
        pH = pH*PH_PARAM_A + PH_PARAM_B;
      }
      if (channel == 1){
        EC = atof(sensordata);
        EC = EC*EC_PARAM_A;
      }    
    }
  }
  
}

void setup()
{
    pinMode(13,OUTPUT);  
    Serial.begin(9600);
    u8g.setContrast(0);
    u8g.setRot180(); 
}

void loop()
{
 
  digitalWrite(13, HIGH);       
  delay(800);
  digitalWrite(13, LOW);   
    
  read_tentacle_shield();

  u8g.firstPage();
    do  {
      draw();
    } 
      while( u8g.nextPage() );          
      
}

Once you have changed the EZO boards to i2C you can now plug everything into the arduino and upload the code into your arduino. Plug the EZO boards into the mini tentacle shield and then plug that shield into the arduino. You’ll notice that the EZO boards make it impossible to plug the LCD screen directly on top – as the EZO circuits make the shield too tall – so you should use stackable headers to extend the connections so that you can plug the LCD screen on top without any problems. Make sure you download and install the U8glib library in your arduino IDE before uploading the code.

As with the previous code you’ll notice there are variables called PH_PARAM_A, PH_PARAM_B and EC_PARAM_A within the beginning of the code that you should change in order to calibrate your probes. Follow the instructions about calibration I gave in the previous post in order to figure this out. Using the calibration solutions that come with your kits you’ll be able to perform this calibration procedure. Whenever you want to calibrate your probes you should reset these variables to their original values, reupload the code and retake measurements.

Following this guide you will have a very robust sensor setup using very high quality probes. These probes are also coupled with a board that has no wire connections with the arduino, offering very high quality readings with very small amounts of noise. Additionally the LCD shield opens up the possibility to add more sensors to your station so that you can monitor, temperature, humidity, and carbon dioxide potentially from a single place.