Nutrient availability and pH: Are those charts really accurate?
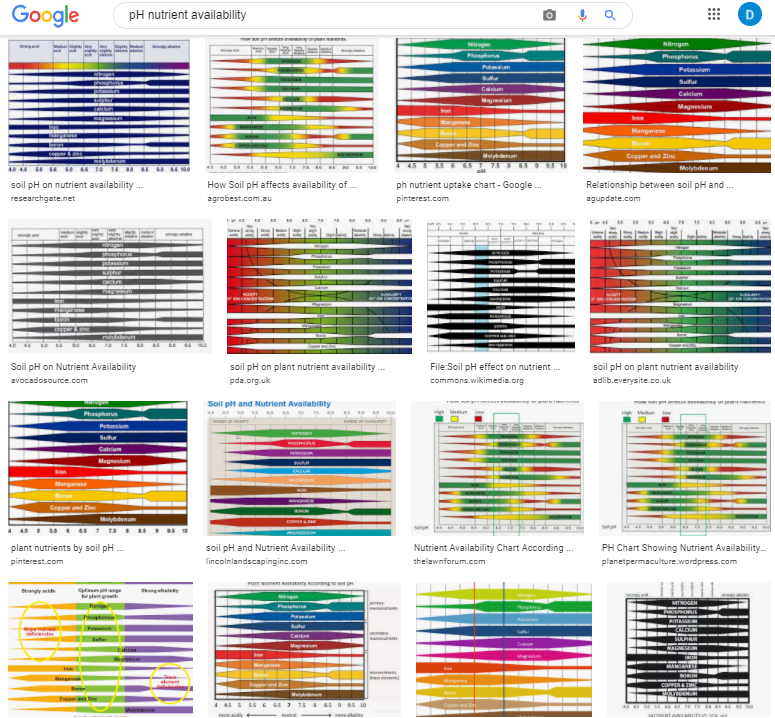
When growing plants, either in soil or hydroponically, we are interested in giving them the best possible conditions for nutrient absorption. If you have ever searched for information about plant nutrition and pH, you might remember finding a lot of charts showing the nutrient availability as a function of the pH – as shown in the image below – however, you might have also noticed that most of these images do not have an apparent source. Where does this information on pH availability come from? What experimental evidence was used to derive these graphs? Should we trust it? In this post, we are going to look at where these “nutrient availability” charts come from and whether or not we should use them when working in hydroponic crops.
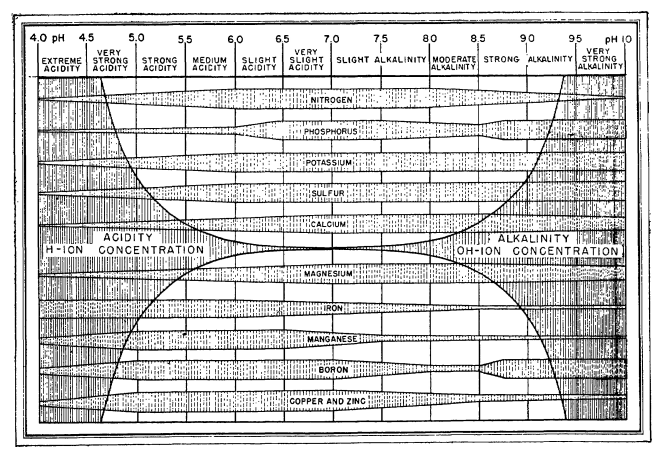
Information about the above charts is not easy to come by. People have incessantly copied these charts in media, in peer reviewed papers, in journals, in websites, etc. Those who cite, usually cite each other, creating circular references that made the finding of the original source quite difficult. However, after some arduous searching, I was able to finally find the first publication with a chart of this type. It is this white paper from 1942 by Emil Truog of the University of Wisconsin. The paper is titled “The Liming of Soils” and describes Truog’s review of the “state of the art” in regards to the liming of soils in the United States and the differences in nutrient availability that different pH levels – as set by lime – can cause.
The paper is not based primordially on judicious experiments surrounding nutrient availability but on Truog’s experience with limed soils and the chemistry that was known at the time. He acknowledges these limitations explicitly in the paper as follows:
I also emphasize that the chart is a generalized diagram. Because adequate and precise data relating to certain aspects of the subject are still lacking, I had to make some assumptions in its preparation and so there are undoubtedly some inaccuracies in it. There will be cases that do not conform to the diagram because of the inaccuracies, or special and peculiar conditions that are involved, e. g., conditions that are associated with orchard crops.
“The liming of soils” by Emil Truog
It is therefore quite surprising that we continue to use this diagram, even though there have been more than 80 years of research on the subject and we now know significantly more about the chemistry of the matter. Furthermore, this diagram has been extended to use in hydroponics, where it has some very important inaccuracies. For example, Truog’s decision to lower nitrogen availability as a function of pH below 6 is not based on an inability of plants to absorb nitrogen when the pH drops, but on the observations done in soil that showed that below this value, the bacteria present in soil could not effectively convert organic nitrogen into nitric nitrogen, the main source of nitrogen that crops can assimilate. In hydroponics, where nitrate is provided in its pure form, nitrate availability does not drop as the pH of the solution goes down.
Several other such assumptions are present in his diagram. Since the changes in pH he observed are associated with lime content, the drops in availability are as much a consequence of pH increase as they are of increases in the concentration of both calcium and carbonates in the media. This significantly affects P availability, which drops substantially as the increase in pH, coupled with the increase in Ca concentration, causes significant precipitations of Ca phosphates. His diagram also ignores key developments in the area of heavy metal chelates, where the absorption of heavy metal ions can be unhindered by increases of pH due to the use of strong chelating agents.

Reading further into Truog’s paper, I found out that his diagram is actually an extension of a diagram that was created almost 10 years before, in 1935, by N. A. Pettinger, an associate agronomist at the Virginia Agricultural Experiment station. You can read this white paper here. In a similar fashion, Pettinger created a diagram that summed his experiences with different nutrients in soils at different pH values, where the pH was mainly increased or decreased by the presence or absence of lime. You can see big differences between both diagrams, while Truog includes all elements required by plants, Pettinger only includes the most highly used nutrients, leaving Zn, B, Mo, and Cu out of the picture. Pettinger also has substantially different availability profiles for Mg and Fe.
Although these diagrams are both great contributions to the field of agronomy and have been used extensively for the past 80 years, I believe it is time that we incorporate within these diagrams a lot of the knowledge that we have gained since the 1950s. I believe we can create a chart that is specific to nutrient availability in hydroponics, perhaps even charts that show availability profiles as a function of different media. We have a lot of experimental data on the subject, product of research during almost a century, so I believe I will raise up to the challenge and give it my best shot. Together, we can create a great evidence-based chart that reflects a much more current understanding of nutrient availability as a function of pH.