Can you grow large flowering plants like tomatoes using the Kratky method? (passive hydroponics)
I have previously shared some tips on how to grow successfully with the Kratky method in my blog before (1). This growing system, which was developed in the early 2000s, uses completely passive setups to grow plants, completely eliminating the need for any recirculation and – for smaller plants – even eliminating the need to replenish nutrient solution. However, the traditional set-and-forget methods used to grow small plants, runs into heavy limitations when confronted with the growing of larger flowering plants, like tomatoes. In this post we’re going to look into these issues, some of the scientific literature on the matter and some setups that can actually be used for the growing of large flowering plants under commercial growing conditions.
In the Kratky method you place a seedling in a cup with a small amount of media on top of a large container filled with solution up to the point where the solution slightly touched the cup. The plant feeds from the nutrient solution, lowering its level and opening up an “air gap” that the plant’s roots can use to get the oxygen they require. Small plants – most prominently lettuce – can be grown like this, because the crop cycle is short enough so that the amount of water in a reasonably size container can last for the entirety of the plant’s life. The effect of the plants on the solution is also milder – due to their smaller size – so nutrient imbalances created in the solution by plant absorption and plant exudates are limited.
With bigger plants, it’s an entirely different deal. A healthy, heavy producing tomato plant will go through 20-30 gallons of water in its entire cycle, so a simple container-based Kratky method would need to have a huge container in order to grow a plant equivalent to a plant grown in traditional hydroponic methods (think a 55 gallon drum). Trying to do this in smaller containers leads to poor results due to the changes that the tomato plant causes in the nutrient solution. Extreme changes in pH – often reaching 9-10 – and great imbalances, will hinder nutrient absorption and lead to quite extreme nutrient deficiencies and problems within the plants. In the best cases the plants will be stunted, limited in production and will yield lower quality produce while in the worst cases they will die and fail to produce any useful harvest.
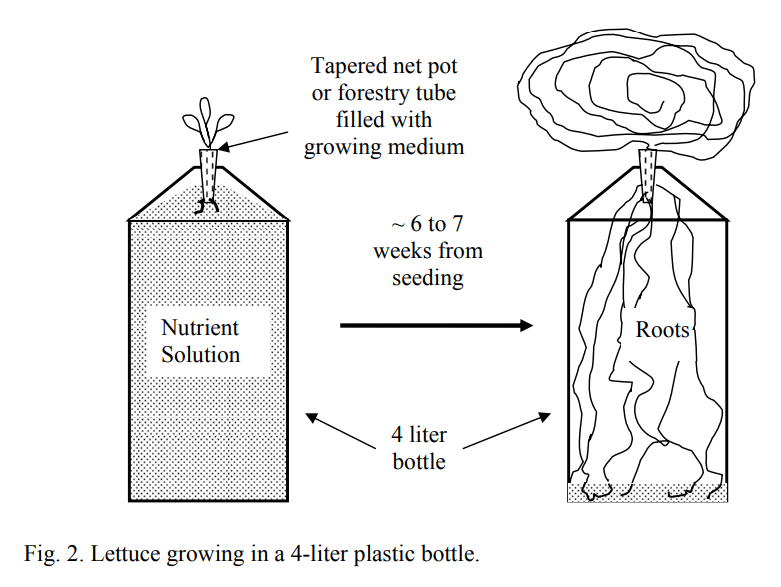
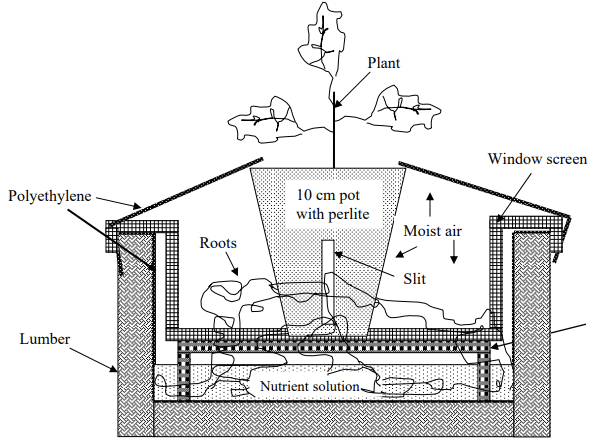
It is therefore impractical to have a fully passive hydroponic system to grow tomatoes or other large flowering plants – especially if we want to rival the production potential of other hydroponics methods – but this doesn’t mean we cannot try to get close. Kratky published a paper in 2005 that tries to create such a system (see image above). In these systems tomatoes are not grown in containers that are perpetually left alone but they are suspended above beds where the nutrient solution rests. Nutrients are only added once – at the start of the crop – and the solution level is maintained at a desired point using fresh water. Since the volume of solution in these beds is much larger than in single containers, the tomatoes generally do much better. The tomatoes also have access to the solution that is used by many other plants, so imbalances also tend to be smaller than those of single container setups. The beds made of lumber and plastic lining are also cheap to build and provide a potentially viable way to do this commercially, although the non-recirculated solution does provide a nasty breeding ground for mosquitoes, a huge problem for this type of setup at a larger scale.
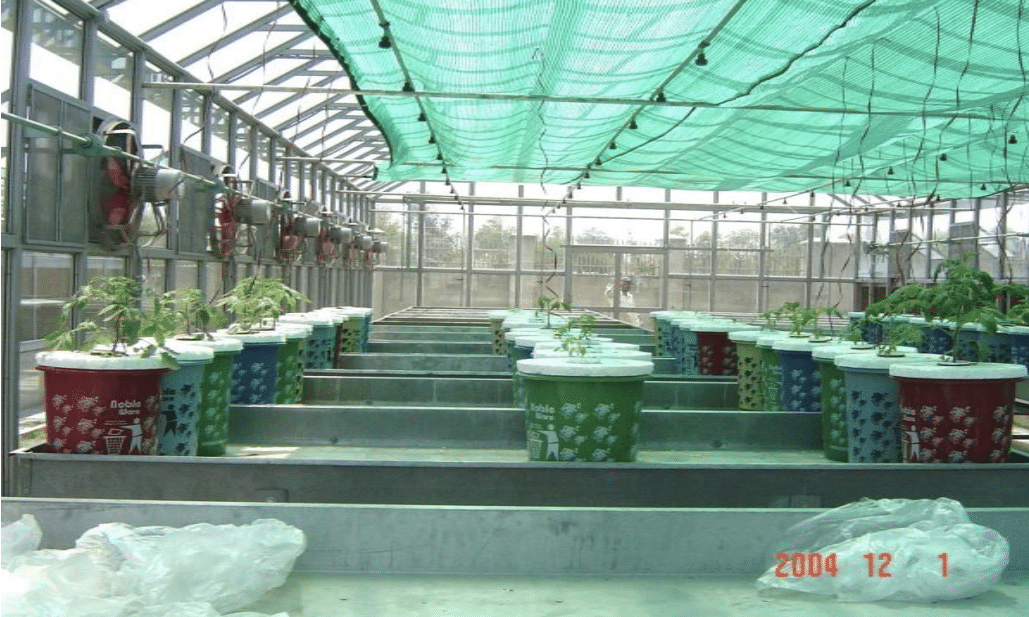
Can you get commercially viable yields without having a 55 gallon drum per tomato plant? If you’re careful! At around the same time Kratky was experimenting with his lumber beds, a group in Pakistan was trying to grow tomatoes in 13L containers using different hydroponic solutions (published here). They initially filled the container with nutrient solution but it is unclear from the paper how the solution was replenished. Since the published volumes of solution used were much higher than the container volumes, it can be assumed that water was added, but it is unclear whether this water contained nutrients or not. Since they say that the pH/EC were observed/adjusted it is reasonable to think that they maintained a certain level within the containers and measured the pH/EC trying to correct these variables with water, nutrients or pH up/down additions with time. They obtained good results with the Cooper solution but the fact that constant monitoring and adjusting was necessary shows that this technique is likely not viable for large scale commercial production as individual monitoring of plants would be a nightmare.
There is a significant lack of research after 2005 in this area, most probably because it has been established that you need to compromise pretty heavily with large flowering plants if you want to grow them without nutrient recirculation or loss of nutrient solution. Systems absolutely need to have very large solution volumes – so large growing beds are probably one of the only viable commercial choices – just because of the water/mineral demand coming from the plants. Additionally the amount of minerals drawn from the water will be large and the imbalances created by their uptake will be large as well. Furthermore, problems with large volumes of stagnant solutions are not small, accumulation of larval pests will be quite substantial and might require the addition of chemical treatments or a lot of additional mesh/netting to alleviate the problem.
If the system is not very large in volume then it becomes inescapable to deal with the toxicity of the solution, which means to adjust it accordingly. At the very least, measuring pH and EC and adjusting them accordingly is the minimum threshold to achieve results that would be acceptable at a commercial level. It is however not viable to do this at a larger scale, as the plants are heavy and having to open the containers, measure and move the plants is likely to cause damage and be very expensive in terms of labor costs.
If you don’t care about volume of production or quality that much and you just want to grow some tomato plants, then doing the Kratky method for tomatoes in 5 gallon containers with a properly formulated hydroponic solution for this purpose might yield some harvest, but the results will be very inferior to those that you could get with either a recirculating system or even a simple drain-to-waste system where the plant is just watered with nutrients with proper monitoring of the EC/pH of the run-off.


/i/4974/products/2020-08-20T11%3A20%3A04.296Z-13671a.jpg?1606306133)