Maximizing essential oil yields: A look into nutrient concentrations
Essential oils are the main reason why several plant species are currently cultivated. These oils have a wide variety of uses either in the food industry or as precursors to more complex products in the chemical industry. Modifying nutrient solutions to maximize oil yields in hydroponic setups is therefore an important task. However, there are sadly no clear guidelines about how this can be achieved. In today’s post I wanted to create a small literature review of different research papers that have been published around the modification of nutrient solutions to maximize essential oil production and see if we can draw some conclusions that should apply to plants that produce them.
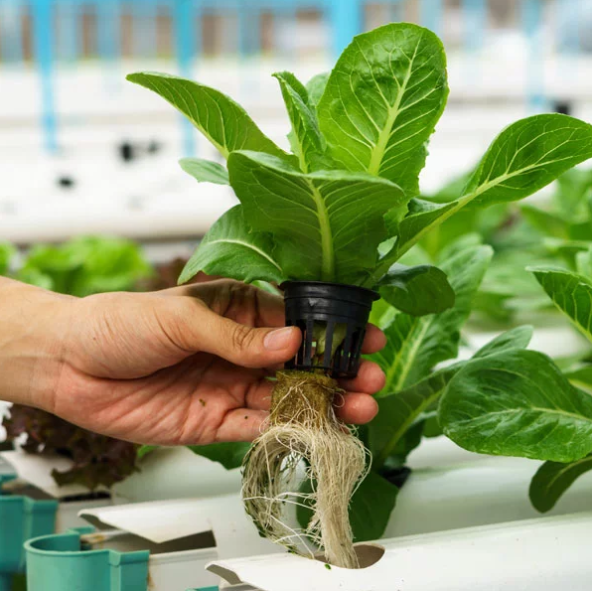
The variety of plants that produce essential oils is nothing but amazing. From plants where mainly the leaves are harvested – such as mint and basil – to plants where the flowers are used – such as roses – to plants where the seeds are used, like coriander. The wide variety of oil sources and plant species implies that the universe of potential research is immense, with every potential nutrient modification in every plant giving a potentially different optimal measurement. However, plants share some important characteristics – like photosynthesis and root absorption of nutrients – plus essential oils within different plants can share components produced using similar chemical pathways. For this reason, a look into the research universe of nutrient solution optimization for essential oil production is likely to serve as a base to guide us in the optimization of a solution for a particular plant.
In the table above I summarize the research I found concerning the optimization of some mineral nutrient in the hydroponic production of a plant, specifically to maximize the essential oil yield. All of these studies optimized the nutrient within a given range and a >= or <= sign is used whenever the optimal value found is at the top or bottom of the range respectively. When more than one nutrient was optimized in the paper, I give you the values for both nutrients so that you can glimpse the optimal. Whenever the researchers suggest an optimal range instead of a value within their research this is also included as a range. I tried to find papers representing all macro nutrients but studies optimizing some elements were hard to find (Mg for example). Although I tried to include as many species as possible some species are just more commonly studied, as they are commercially more relevant (like mint and basil).
From these research results we can immediately see some clear trends. From all the studies there is no result where optimal total nitrogen concentration is below 150 ppm and 3 out of the 4 studies I found, agree that the optimal N concentration is at 200 ppm. In the case of K all studies agree that K should be at least 200 ppm, but I did find a study on mint that got a value of 414 ppm, far larger than the value found in other studies for the same specie. This is not an uncommon discrepancy in hydroponics – optimal yields being mixed in a wide range above 200 ppm of K – which can be caused by other issues that can affect K absorption, such as the concentration of other important cations (like Ca and Mg) in the studies.
I was only able to find two studies that focused on Ca and both agree about optimal values between 150 and 180 ppm, although they address two completely different plant species (basil and chrysanthemum). In the case of Mg I found only one study and its conclusion was mainly that you want to have more than 36 ppm of Mg in solution. This is not surprising as Mg is rarely a growth limiting element in hydroponics and usually growth will not be limited to it unless its supply is very low compared to the supply of other nutrients (which is very rarely the case).
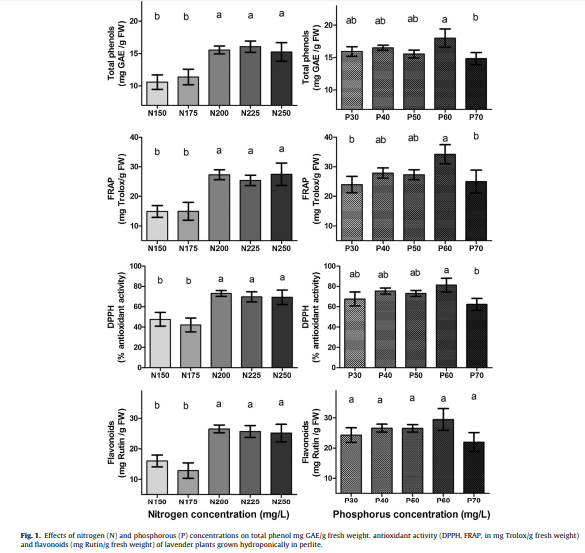
In the case of P, it’s not surprising that most papers that addressed this nutrient studied plants where the essential oils are mainly in the flowers (rose and lavender), as phosphorous is a nutrient commonly associated with flowering. In the case of rose the best value in the study was sadly the upper limit and in the case of lavender the optimal value reached was 50 ppm. In this case we can therefore probably only say that both studies share having an optimal result of >= 50 ppm but it’s hard to provide an upper bound for this. A study addressing P in spearmint also finds optimal P to be within exactly this range at 50-70 ppm.
| Element | ppm |
| N | 200 |
| P | 60 |
| K | 200 |
| Ca | 160 |
| Mg | 45 |
With these results in mind, we can sketch a base solution for a plant where essential oil production is being targeted.. An obvious guess would be to start with a solution with the concentration profile showed above. In this case we target N and K at 200 with an N:K ratio of 1 and we keep Ca at 160, making the K:Ca 1.25 (which is surprisingly close to the optimal value discussed in my Ca post). We leave P at 60 – the middle of the 50-70 range – and we keep Mg at 45, which is > 38 and is a value commonly used in regular hydroponic solutions. The above will certainly not be the best solution for any single plant a priori, but it might provide a good base to start optimizing from if the objective is essential oil production.