Using my Nutrient Calculator with Commercial Fertilizers : Part No.1

One of the main reasons why I wanted to develop a nutrient calculator for hydroponics was to allow people to understand the amount of nutrients they are adding to their solutions and to use the calculated amounts to either use common salts to achieve the same nutrient percentages or to understand which salts are needed to adequately compliment the nutrition achieved by their hydroponic nutrients. On these posts I intend to show you how you can use my hydroponic nutrient calculator with your commercial hydroponic nutrient composition, figure out the amount of nutrients given by a certain amount of the fertilizer, adapt your fertilizer to a given formulation you want, supplement your nutrient with other salts and get a similar composition yourself with easily available salts (which are used to make your hydroponic nutrients most of the time). For this tutorial you will need my hydroponic nutrient calculator available here.
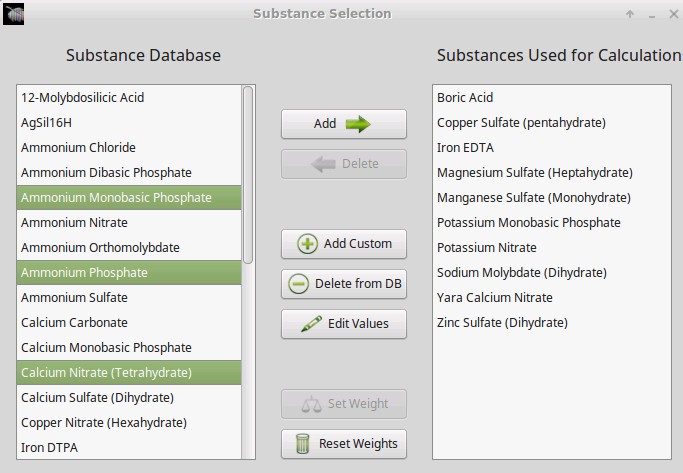
First of all, lets learn how to add a given nutrient commercial fertilizer to your list of hydroponic salts/nutrients. After you open the program go to the “Nutrient Salts Used” tab and select the “Add New Salt” button. A screen will pop up in which you can input the percentage composition values of your fertilizer. As an example, let us use the FloraBloom fertilizer from general hydroponics and add it to our fertilizer list. The fertilizer composition given on the product’s label is available here. Below you can see an image of the added percentages on my nutrient calculator, note that the K2O, P2O5 check box is used as the percentage values on the label are given as oxides for K and P. After finishing the addition the “GH – FloraBloom” item becomes available in the bottom of the page.


We are now going to calculate the ppm values for the different nutrients we would get for the recommended addition of 1 tbsp/gallon for regular growth. Since 1 tbsp is 15 mL and we assume the fertilizer density to be 1 g/mL we get an addition of about 15g per gallon of solution. We input 15 in the field next to the fertilizer name, leave the purity at 100% and go to the “Salt to Formulation” tab where we input a volume of 1 gallon. We then get the results shown below. You can see that this preparation would give us around 87 ppm of P, around 131 ppm of K, 60 ppm of Mg and 40 ppm of S. Now that you know how to get these values it becomes easy for you to know the amount of nutrients you are getting for a given amount of any commercial fertilizer simply by using the composition values available on the label.


Getting these values is only the first and easiest thing we can do with commercial fertilizers using my calculator but you will see within the next few tutorials that much more powerful things are possible. Right now you can also get the ppm values of different mixes of commercial fertilizers as well as current ppm values you are getting with any custom regime you are using. For example you could upload the whole General Hydroponics series to the calculator and see the different ratios you can achieve with different proportions of their products.

On the next tutorial we are going to use the above mentioned fertilizer as well as a predetermined formula to determine which salts are needed to compliment the above solution and obtain a well-balanced custom formulation. After that we are going to see how we can use the above obtained ppm values to makeup our own copy of this fertilizer as well as how we can improve it. I hope you are enjoying my free hydroponic calculator and that you leave any comments you may have :o)


Possible New Features for my Hydroponics Calculator

A few days after the release of my hydroponic calculator free software implementation I can tell you that I am absolutely happy with the results. The calculator had some resolution problems at first but these problems where easily fixed. After changing to a tabbed interface and by including the ability to save and load nutrient recipes I think that the calculator is on its way to become one of the most important tools for serious hydroponic hobbyists and small business owners. Right now the calculator allows you to get precise weights of different nutrients to prepare your own hydroponics solutions something which no other free software available online does. This allows people to save great amounts of money and achieve very good results around their hydroponic crops, at least when dealing with nutrients. However I believe that there is still a lot to do and for this reason I will be writing today’s post about my ideas for the calculator and it will also be great to know what you have in mind :o)

There are several things I want my calculator to be able to do in the future but first of all my focus will be on everything dealing with hydroponic nutrients. The first important additions I am working on mainly deal with the ability to add custom salts to the program and obtain results of ppm concentrations achieved by placing certain amounts of salts within the solutions. Certainly being able to go from a given weight of salt or commercial fertilizer (with known percentage element compositions) to a ppm concentration will allow people to know how adequate their recipe is and – moreover- it will allow people to play with different levels of salts if they feel that the currently “automatic” salt quantity selection is not doing the best possible job. It will also allow people to “reverse engineer” their commercial hydroponic solutions by figuring out their ppm contributions, later using those on the nutrient design tab to obtain salt weights to arrive to those concentrations. By using different sources people will also be able to pinpoint with good accuracy the nutrient sources used by their favorite commercial blend.

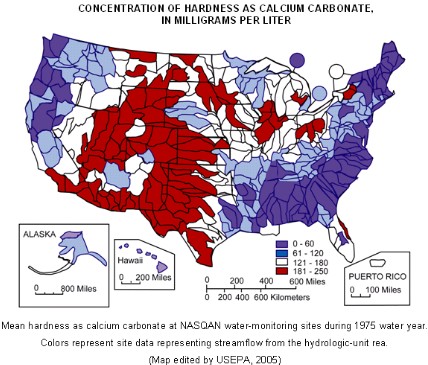
The next big feature I am looking forward to add is a “water quality” section which will help people adjust their nutrient solution to their water quality parameters. Things such as hardness, carbonate levels, magnesium, calcium, pH, EC, nitrogen and QOD (chemical oxygen demand) might be important parameters I will take into consideration within this section. A pH and EC prediction module – which is almost finished – will help people calculate an estimate of what their final solution properties for a given formulation might be.

Even though these features are bound to add great flexibility to my calculator, I believe that right now this is only the “tip of the Iceberg” of the potential the software has. After doing this I will attempt to put all my chemical knowledge regarding hydroponics crops into practice by inputting “optional additions” that people will be able to choose when preparing their formulations. For example, you might want to choose the “hydrogen peroxide regime” option and a summary giving you usage instructions as well as detailed explanations of how much peroxide to add and when to your reservoir will be shown. Similar options ranging from “potassium silicate treatment” to “cobalt supplementation” might become available as the calculator progresses.

As you see, there is a lot in storage for this little calculator program which I am hoping to rename to something like “hydroponic buddy” once version 1.0 comes out. Right now I am working on all the features and relearning a lot of Delphi programming which I honestly haven’t done extensively for almost 10 years. Do you have any suggestions for my hydroponic nutrient calculator ? Do you have any suggestions about what you would want to do with it ? Please leave any comments, questions or suggestions below ! By the way, you can get the latest version of the calculator here.


Building Your Own High-Power LED Grow Lights for Hydroponics

You will often hear in the world of hydroponic growing that Light emitting diode (LED) lights simply do not work as well as the traditional HPS (high pressure sodium) or Tungsten Halide lamps when growing large plants. The truth is that this belief is centered around the fact that most of the commercially available LED fixtures are built with low-power cascade LEDs that simply do not give your plants enough light intensity to grow properly. The fact that people do not know how to distinguish one from the other, coupled with the problems of getting a genuine, high power LED lamp makes the use of LED fixtures in hydroponics limited and almost never considered a serious option for modern growers. On today’s post I want to talk a little bit about how you can build your OWN high power LED lamp and how this way you can get a cheap, low-energy, highly-efficient device to make your plants grow.

The first thing you need to consider here is the amount of LEDs you will be using (the amount you will require for your plants) and the power supply you will need to feed those little hungry fellows. From my experience I can tell you that the lumens measurement of high power LEDs does not give you an accurate estimation of how many you need since LEDs have a highly centered light spectrum that is more accurately measure in micro Einsteins (the appropiate measurement unit for these devices). In this case I advice an empirical measurement of 5, 3W high power LEDs for each plant you wish to grow and 1 blue LED for every 10 red LEDs. (below you can see a picture of one of my LEDs, the LED was dimmed to get a better picture)

The second thing you want to do is buy the LEDs, just google red or blue 3W high power LED on ebay and you will find several chinese or US providers who will sell you these great artifacts for a small price. When you get your LEDs make sure you buy at least 3-5 more than what you will need since these LEDs are sensitive and they will burn easily if you wire them incorrectly. Since the power requirements of these LEDs are also pretty high they will get VERY hot (however much cooler than traditional lamps) and they will need to be mounted on aluminimum rails with at least one 6 inch fan for each 5 LEDs (or a BIG rail than can dissipate all the heat).

The next part – which is the most difficult – is the building of the power supply and voltage regulator side of the device. You can use a laptop supply to power up some LEDs but you need to calculate their power requirements so that you know how many you can power up for the power supply you will be using. A very good guide I used to create my LED assembly can be found here. Of course you should change the setup and LED number to fit your needs but the tutorial shows you exactly how you can choose the power supply, calculate LED needs and build the voltage regulator with a simple electronic circuit.

Finally, after I finished I hooked the power supply of my LEDs to a regular appliance timer which sets them on and off at certain times of the day. Making sure that my basil plants get enough light for their growth even when I am not at home. It is very worth noting that before I installed this LED fixture my basil plants were extremely leggy, etiolated and just dying. A few days after the LEDs where in place they started to grow like crazy :o) Do you have any questions, comments or suggestions ? Have you also built your own LED fixture ? Leave a comment below !


A Simple Home-Made PVC Hydroponic Growing System

When I moved into my new apartment I wanted to build a small hydroponic system I could use to grow basil just next to a window. Since I absolutely love to cook Italian food and fresh basil is a key ingredient this seemed like the best solution to enjoy my cooking to its fullest and practice the building of a new hydroponic system. I finally decided to build a very cheap and simple PVC system which currently hosts 6 beautiful basil plants that give me more than enough basil for all the Italian cooking I could possibly want. On todays post I want to share my system’s design and description with you as well as some picture of my basil plants, showing you how they are doing under this great – yet very simple – PVC hydroponic growing system.
The system I built can be classified as a continuous Ebb and Flow system. It basically has a 2 inch PVC pipe with a horizontal cut on top, a reservoir, an air pump, a water pump and a 1 inch PVC framework that also acts as a secondary reservoir for the nutrient solution. The system is filled with river bed gravel as a growing media and it can be used for the growth of almost any type of plant. Of course, any rocky media that easily allows nutrient solution flow can be used and a larger pipe diameter can be used to grow other plants such as tomatoes, cucumbers, etc. For larger plants a 4 inch diameter PVC pipe and a 2 inch frame work would be required. A diagram of the system is shown below (sorry for the poor drawing skills ;o) ).

As you can see, the pump constantly sends solution from the reservoir below to the gravel bed inside the 2 inch PVC pipe located above it. The solution recirculates and goes down to reenter the reservoir. Even though the actual passage of the solution may seem “biased” towards once side, the truth is that a small part of the solution actually flows through the whole pipe and ends up draining through the other side as I have not noticed any difference in development between plants in opposite sides of the tube. Since there is a level that has to be filled within the tube before a return of solution is established there is a constant feeding of aerated solution for the plants.

This system is very cheap to build and it can be made with 6 – 90ยบ elbow joints, 3 – T joints, 2- 2′ to 1′ adapters, 5 feet of 2 inch PVC piping and about 10-15 feet of 1 inch PVC piping. You also need a container that can hold enough nutrient solution volume, a water pump and an air pump. The system provides very good growing conditions for plants and the gravel media provides adequate support for a wide host of vegatable varieties. This system is also great for strawberries and similar crops. Several improvement over this design are obviously possible and many will be featured on future blog post articles as I implement and test them.

The above picture shows you my setup with the basil plants currently growing vigurously (they are currently about 60 centimeters high). Above the system you can have a small look at the high power LED fixture I built myself to provide these plants enough light (as hardly any light gets through the window). I hope you have enjoyed this article and decide to build your own simple home-made PVC hydroponic growing system. Make sure you leave any comments with questions or suggestions you may have :o).


Understanding pH in Hydroponics – Part No.2

Yesterday – on the first part of this article – we talked about the nature of pH, the origin of pH changes in hydroponics growing and why these changes happen with time within a hydroponic culture, I also talked a little bit about how to prevent pH changes by building a balanced solution with a given percentage of nitrogen given as ammonium. On the second part of this article I am going to talk about the adaptation of plants against pH changes, why certain pH levels are needed and why there is an important over-focus on the importance of pH which does not need to be maintained in ranges as narrow as most growers believe.
What is the ideal range of pH for plant growth ? The fact is that plants can grow ideally from a pH of 5.5 to about 7.0. Above or below these values certain changes start to happen within the chemistry of the solution that makes nutrients less available to the plant. The large importance of adequate – yet not excessive – control of pH values is to maintain an optimum absorption of nutrients for your plants. When we go below a pH of 5.5 certain nutrients like iron become very readily available while nutrients like phosphorous and nitrogen become much less available. This lack of availability has two main causes. The first one is the overall change of chemical species within the solution, with the newly generated species being difficult or impossible to assimilate by the plant while the second one is that species that become extremely available generate a strong antagonic effect against some nutrients. For example, iron is antagonic with phosphorous and with a pH decrease below 5, the absoprtion of iron becomes extremely easy and therefore the aborption of P becomes more difficult, the overall formation of acid phosphate species which are also not so readily available by the plant further reduces P availability. An image shown below gives you a good idea of the availability of nutrients for plant growth as pH changes.

However most growers tend to believe that the pH level of their nutrient solution is the pH level that plants have around their roots, something which is actually not correct in the sense that plants have evolved local pH adaptation mechanisms to survive to changes in soil pH. When you measure the pH of your nutrient solution you are measuring the pH of the “bulk” while the pH of the actual root-zone of your plants might be within the ideal zone for nutrient absoprtion. Therefore growers usually underestimate the actual capacity of their plants to correct pH and spend an enormous amount of time tinkering with pH to make it “ideal”.

The fact here is that plants do not like abrupt pH changes like those that happen when you add pH up/down to continuously adjust your nutrient solution’s pH levels. Plants can deal perfectly with a slow pH increase caused by nutrient absorption from 5.5 to 6.5 but when you – in a matter of seconds – revert the pH back from 6.5 to 5.5 in a matter of seconds you are causing your plants significant levels of stress since they are simply not used within their natural environment to such quick pH changes.

The easiest way I have found to deal with pH is to simply not obsess with it. Most solutions that are well balanced and contain about 10-15% of the nitrogen as ammonium and about 20-40 ppm of phosphorous will adequately contain pH within the 5.5 to 7 pH region from the beginning of your nutrient cycle to the time when the nutrient solution has to be changed. As a matter of fact – beyond the initial adjustment – the changing of pH can be avoided if the nutrient solution is adequately formulated and given in a quantity of at least one gallon per plant. Plants develop well around these pH levels and the improvement you gain from obsessing about perfect pH zone levels will be lost by the stress you put into your plant roots with pH corrections. Of course, there are easy and almost perfect solutions to pH control like the method using ion exchange resins I mentioned in a previous post. A method that mimics the way in which pH is naturally buffered within soil.

Therefore if you want to have a great hydroponic crop with little maintenance and a very good yield I would advice you to prepare your own nutrients taking pH-self balancing and adequate nutrient ratios into account. Certainly this method will give you a lot of control over your composition and a great saving in solution costs.

I hope that after reading these two posts on pH in hydroponics you have now grown a much better understanding of how pH is, how it works and how it evolves in a hydroponic culture. It is very important for you to understand that pH plays a vital role in nutrient absorption but that obsessing with strict pH zones is not beneficial for your plants in the sense that constant additions that cause quick changes in pH values cause stress to their root zone. Adequate nutrient design and a good understanding of how nutrient interact is therefore important for the correct use and low maintenance of a hydroponic crop.


Understanding pH in Hydroponics – Part No.1

When water reacts with itself to create the H3O(+)(hydroxyl) and OH(-) (hydroxide) species, one of the most fundamental and important characteristics of aqueous solutions is generated. The reactivity of a solution and its interaction with living organisms is determined in a great extent by the concentration of these two species, a variable usually measured as pH which is nothing but the negative value of the logarithm of the concentration of the H3O(+) ion. In hydroponic culture – where our plants are in great contact with aqueous solutions – the understanding of the role of the H3O(+) and OH(-) ions and their measurement as pH becomes very important if an in-depth understanding of what is going on wants to be attained. On today’s post I will attempt to guide you into this micro world of pH and how and why pH changes within a hydroponic crop. Tomorrow -on Part No.2 – I will try to explain to you how plants adapt to pH changes and what a pH change actually means for a living organism.

What determines pH ? This variable is inversely proportional to the concentration of H3O(+) ions and directly proportional to OH(-) ions, the more hydroxil ions you have the more acidic your solution will be (the lower the pH) while more hydroxide ions will increase your pH and give you a higher pH reading. It is important to understand here that hydroxyl and hydroxide ions determine each other’s concentration. Since water’s self-reaction equilibria must be maintained, the sum of pH and pOH must always be equal to 14 (a neat consequence of chemical equilibrium theory). When the concentration of hydroxyl and hydroxide ions is equal, pH and pOH contribute equally to the solution and they are therefore both 7, reason why the pH of a neutral solution has this value.

Now that we know a little bit about pH we can understand better what happens when plants interact with a nutrient solution. When a plant is put within a given solution it wants to absorb the nutrients it needs to grow. These nutrients are avilable as ions that have a given charge. For example, nitrogen is absorbed as the nitrate ion (NO3(-)) while potassium is absorbed as the K(+) ion. When a plant takes potassium in, it deplets the solution of a positive charge. Since the solution must remain neutral the plant gives the solution an H3O(+) ion to compensate. The plant has therefore decreased the pH of the solution by absorbing a potassium ion. When nitrate is absorbed – an ion with a negative charge- the plant does the opposite and exchanges the nitrate for an OH(-), the pH of the solution is increased.

If plants absorbed nutrients in a perfectly symmetrical fashion, they would not increase or decrease pH as overall charge changes would be compensated. However – as no one is perfect- plants absorb nutrients at different rates and they therefore create a “pull” towards a certain pH region. If a plant absorbs nitrate heavily it will start to contribute far more OH(-) than H3O(+) ions into the solution and the result will be a net increase in pH. Depending on the composition of the nutrients and the overall growth stage of the plant, different net movements in pH can be achieved by the plant.

The most influential factor in the changes of pH within a solution is generally the composition of the nitrogen component of the solution. When plants absorb ammonium ions NH4(+) they tend to decrease pH while nitrate – as mentioned above – tends to increase pH when absorbed. If you contribute a percentage of the nitrogen in your solution as ammonia the net effect will be a beneficial “absorption pH buffer” since plants will take nitrogen in both forms, effectively delaying the onset of important pH variations. Of course, the ratio of nutrients also performs a vital role since plants’ nutrient absorption mechanism are largely non-specific and they are greatly influenced by the different concentrations of nutrients within the solutions. Having a nutrient solution designed to provide an adequate balance will be vital in helping you control pH fluctuations.

On part two of this “understanding pH in Hydroponics” post I will talk about the range of pH plants can live in, how they adapt to changes in pH and other interesting aspects that will help you better understand the role and true importance of pH within a hydroponic crop. I hope that today you have acquired a rough idea of what pH represents, the nature of pH changes and some basic things that can be done to improve the pH balance within your hydroponic culture.


Growing a Hydroponic Garden Without a pH or EC meter

So you have decided you want to start a hydroponic garden but you do not want to use a pH or an EC meter. It is fairly common for people to feel this way when they are starting their own hydroponic gardening due to several reasons. Maybe you are not very familiar with the technical side of hydroponics, you don’t want to get into all that stuff in the beggining or perhaps pH/EC meters are terribly hard to get or expensive where you live. Does this mean that without a pH and EC meter you won’t be able to run a successful hydroponic venture ? No. On today’s post I am going to talk to you about how you can grow hydroponic crops without a pH or EC meter and yet get good results, sometimes even better than people using all those technical gizmos :o).

As a chemist I think like a scientist and part of this way of thinking is the controlling of variables. I like to control pH and EC because I feel that this allows me to have a record of what is happening within my nutrient solution, without these measurements I would be “blind”, so to speak. However when I was beginning my major I started my first hydroponic ventures with absolutely no control over pH or EC. I didn’t do this because the cost of an EC/pH meter where I lived was prohibitive so I said, “what the hell” and went for it. I have to say that I got some very satisfying tomato crops after having some significant failures due to both rookie mistakes and disease. I managed to get full, 2 meter high tomato plants filled with delicious vibrant tomatoes and this happened without ever checking my pH or EC.

How did I manage to do this ? After time went by and I got an EC/pH meter, I started to monitor how my crop evolved with time to know what I should or should not do to improve my corp’s yields. I found out that the pH of my crop increased steadily – and sometimes came near 8 – before I usually changed my nutrient solution. The EC oscillated widely but my reposition of the initial “level” of solution with water was enough to keep the EC at a good level. So if you want to be successful with hydroponic crops, it is not absolutely vital for you to have a pH or an EC meter, you just need to follow some simple guidelines to have a wonderful hydroponic crop.

1. Have one gallon of nutrient solution per plant. Having this volume of solution in your reservoir per plants allows you to have enough nutrients so that each plant will take a significant amount of time to absorb them. Having less solution is troublesome since your EC will change wildly and your nutrient solution changes will have to be more frequent. A one gallon per plant rule of thumb seems to be the best choice.

2. Add fresh water to recover the initial level of your solution . This is one of the easiest things to do. By adding fresh water -without any nutrients- to top off your reservoir to its initial level you will keep the EC near its initial value for the whole time. This simple technique ensures that your EC remains within rational levels and your plants stress-free.

3. Change your solution every 4 weeks. After 4 weeks, in a hydroponics system where there is one gallon per plant and the solution is continuously topped off (at least once a day) you will find that your plants have used about 40% of the nutrients at most (this is what I got from full production tomato plants and an atomic emission analysis of the nutrient solution). This means that your solution is now deprived of nutrients and it is time to use the solution to water your soil-garden and prepare everything again.

With this simple guidelines, anyone will be able to grow a hydroponic garden without using a pH or an EC meter. Of course, in the beginning you may find some problems while you find the adequate level of nutrients your plants need (if you do not prepare them yourself) but after a few trial and error runs you will be able to grow full hydroponics gardens without having to constantly monitor either pH or EC. Certainly, better results are achievable when you are monitoring these variables but it is possible to grow a beautiful hydroponics crop without the slightest monitoring of these aspects of a hydroponic nutrient solutions. People usually underestimate the ability of plants to adapt to changing conditions, something that they are able to do beautifully if you only follow the above advice. Do you have any advice or suggestions to help people grow without an EC or pH meter ? Feel free to leave a comment :o)


Is OceanGrown Fertilizer a Scam ? A Scientist’s Point of View

In recent days I was contacted by a person who wanted to start selling the OceanGrow fertilizer who asked me to be the head of a research team to do scientific tests to evaluate if there is actually any value behind the OceanGrown fertilizer. After going through its webpage and doing and in-depth review of scientific literature on the subject I have acquired quite a lot of information about this fertilizer and its real potential as an organic solution and replacement for traditional fertilizers. On today’s post I want to discuss this fertilizer, which is supposed to be used on either soil or hydroponics, and give you my opinion as a scientist and what the currently available scientific evidence tells us about the effectiveness of this and similar products.
The OceanGrown fertilizer is nothing more than sea water which has been concentrated – probably using reverse osmosis – to give us a fertilizer that is supposed to replenish the minerals lost in soil and provide plants with 90 elements for their adequate and healthy growth. The website has an overall pseudo scientific tone with absolutely no reliable scientific evidence shown and basing all conclusion on “facts” that have not been scientifically proved. For example, the website says that elements in sea water are in “ideal concentrations” when this has no scientific basis, no one has proved that certain nutrient concentrations are ideal and no study has actually been conducted to see if the concentrations of micro nutrients on sea water are ideal for plant growth.


Besides this, the people at OceanGrown assume that having all elements is “good” when actually even small amounts of mercury, lead, cadmium and other heavy metals can cause chronic effects when eaten continuously. They also show evidence that the elements are absorbed by the plants fed with their product something which is absolutely obvious given the fact that ionic species are absorbed by plants since their absorption mechanisms are not extremely controlled. Does the fact that a plant absorb aluminium or gold prove that the element is essential ? No, plants absorb ionic species without too much selectivity and when you feed a plant with a solution containing non-essential nutrients the plant is bound to absorb some. This effect is widely studied in science to remove heavy metal contamination and other ionic species using plants. There is no scientific evidence that points out that any elements besides C, H, O, N, P, K, Mg, Ca, Fe, Zn, Mn, Cl, Mo, B, S and Cu are essential to plant life or needed for the adequate and healthy development of plants.

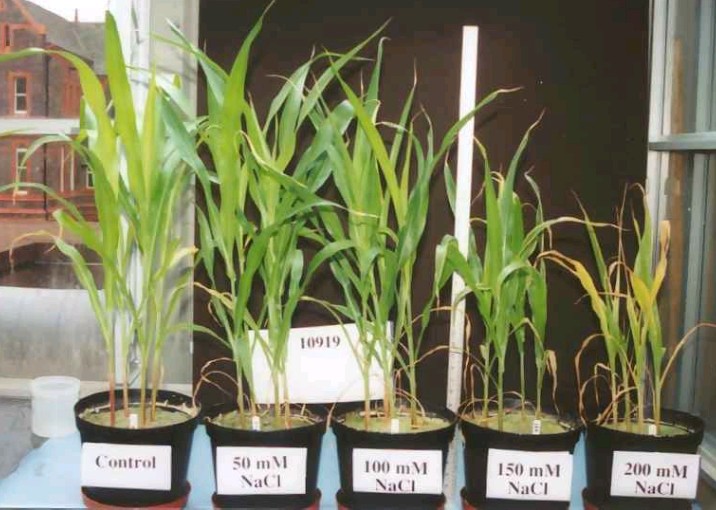
The “essays” carried out to test this fertilizer’s efficiency also lack any use of the scientific method and fail to discard very plausible causes of this fertilizer’s sometimes positive effects. For example, increases in conductivity have been found to improve certain crops in hydroponic culture so the effect of this fertilizer might only be of ionic strength increasing which might help certain crops achieve better results. It is also possible that some micro nutrients – which are depleted in soil – might be added by this fertilizer but in the long term the excessive amount of sodium and chloride ions contained in sea water is bound to cause problems. The evidence that increased sodium concentrations in hydroponic crops causes damage to plants is a well established fact in the scientific community.

The people at OceanGrown seem to be trying to sell a fertilizer with extremely limited and lack of adequately confirmed evidence based on a series of pseudo scientific facts that are not adequately backed up by our current understanding of how plants work. This fertilizer might be able to work to some extent but the reasons why it does or if it causes any long term problems and damage to soil needs to be addressed to confirm the viability of this solution. Right now there is not even one single study published on a peer-reviewed scientific journal that talks about the effectiveness of OceanGrown or true scientific essays done with this solution. It seems evident to me that similar effects as the ones shown by this fertilizer might be achieved by a simple application of an adequately formulated micro-nutrient mix and that positive effects from all the trace elements found in sea water might be limited or undetectable at best.

In conclusion, I think that the OceanGrown fertilizer is a big business based on selling sea water that is currently based in pseudo scientific results. There is no evidence that plants need or benefit from 90 different elements and there is also no evidence that shows that this fertilizer has no long term ill effects due to the excessive sodium enrichment of soil. If this people were truly serious about proving that their fertilizer works in a unique way based on all of its trace elements they would have made adequate scientific trials years ago with reputable scientists from world renowned universities. My advice if you are thinking about using this solution would be to use what we know and have determined works for plants. The application of adequately formulated micro nutrient blends and full fertilizers is a much better solution than a pseudo scientific mess with no adequate scientific evidence of unique results.

Of course I am a scientist and as soon as there is a peer reviewed publication on a well-respected journal done by an unbiased researcher I will be the first to reexamine my conclusions and use this fertilizer. Meanwhile OceanGrow remains unproved and their claims or at least their explanations, remain pseudo scientific.


Fruit Quality and High EC values in Tomatoes

You may remember an article I wrote last year about the effect of salt concentration in tomatoes and how several different studies have been done about this matter. On that article I talked about a paper released in 2007 showing that tomatoes raised at an electrical conductivity value of 4.5 dS/m had the best tasting and fruit quality. However, this study was not conclusive in the sense that quality parameters used on the plants where not extensive and adequately analyzed. On today’s post I want to talk to you about a previous study done in 2006 which does include fruit quality parameters and a clear explanation about which conductivity levels give you the best tomatoes and why this is the case.

The relantionship between high conductivity and high fruit quality clearly depends on how you evaluate fruit quality. In general, the nutritional quality of a fruit is measured by the concentration of important nutrients within it. In the case of tomatoes, important nutrients such as lycopene, vitamin C, carotenoids and phenolics determine most of the tomato’s nutritional value. However, fruit quality – from a market perspective – relates to size, shape, uniformity and firmness and market duration.

On a study published on the Journal of Agricultural and Food Chemistry in 2006, Woitke et al discussed the effect of electrical conductivity on the yield and quality of tomato crops. Their conclusions after analyzing the concentration of several nutrients at different salinity levels was clear : tomato crops which are raised at higher EC levels have lower overall yield but the concentration of nutrients (vitamin C, lycopene and beta-carotene) was increased by as much as 38% on high conductivity treatments (again at about 4-4.5 dS/m). They also found a nutrient-quality increase as the antioxidative capacity of the phenols and carotenoids increased on the plants with high nutrient treatments.

Another very important fact is that not only nutritional value was increased but total dissolved solids and organic acids – which contribute significantly to the fruit’s flavor – also increased significantly. Overall the study concludes that all quality related parameters increased with the increase in salinity pointing out clearly that raising tomatoes at high salinity levels is an excellent way to increase fruit quality. The reduction of yield can be compensated for by the higher inner quality of the fruit allowing it to compete more effectively with other higher-yielding yet lower quality productions within the market.

So next time you want to increase the taste and nutritional qualities of your tomatoes just raise your EC levels so that your fruits accumulate the higher levels of nutrients and flavor producing substances that reside within every small tomato. Certainly your tomatos will be the envy of all other growers with their higher nutrient and flavor levels and increased antioxidative capacity.


The Best Outdoor Hydroponic System. A Simple Way to Grow Large Amounts of Food

I have always seen that there is not a lot of information regarding outdoor hydroponics and the building of scalable and cheap systems that may provide large amounts of food without the complexity, trouble and expense of building a greenhouse. For the past several years I have been puzzled by this issue and I have challenged myself to build an outside hydroponics system that is able to deal with environmental conditions successfuly, providing adequate conditions for plant growth without significant expenses and without the need for any protective enclosure. Finally, I came up with a system which – I believe – has a lot of promise for the above, giving us the opportunity to build an outdoor hydroponic system which has a low cost and a very high productivity potential. On today’s post I will be talking about this system and how it can be easily built with less than 1K USD for each 100 square meters.

How do you build a scalable system that can be used on the outdoors with minimal problems due to uncontrolled environmental conditions ? The easiest thing I could think of was a simple continuous flow system which used the ground itself as a place to put the plants. This system uses no NFT channels, no large amounts of PVC pipes and absolutely no complex engineering. The system – shown on the drawing below – is simply a channel which is dug on the ground of about 2 meters wide by 25 cm deep. The nutrient reservoir can be a tank burried in the ground or a reservoir made from bricks and tiles out of another hole dug on the ground depending on the actual volume needs of the crop. The hydroponic system uses a PVC line connected to a pump to irrigate the system at the top and a small decline in the slope of the channel allows the solution to return to the tank through an underground pipe shown in dark blue. The channel is filled with a nutrient media that has adequate drainage and the nutrient solution is fed continuously through the irrigation system. Of course, when the channel is dug on the ground the soil has to be covered with a polyethylene sheet to prevent the solution to drain into the soil.

This system allows you to grow a wide variety of crops, from tomatoes to lettuce heads. The system can be used to grow plants of various sizes and nutritional needs since the media and continuous flow irrigation provides great oxygenation as well as a cheap alternative to more complex systems such as NFT or PVC pipe systems. The system is also absolutely scalable, it can be built from a few square meters to a full plot size commercial cultivation facility without significantly changing the principle of operation. Since the surface area of the system is also large, and all nutrient solution is returned to a central reservoir, rain volume can be accurately determined and nutrients can be added or changed to make up for this effect of external environmental conditions.

The image shown below shows you how the system can be expanded to a full plot system without any modification of the fundamental working principle. The only things that need to be bought to start this system are a tank, a shovel, a polyethylene sheet as large as the channel requires, PVC pipes for the irrigation system and returns pipes, media, nutrients and seed. Since there is no greenhouse, no gutters, no polymer channels and no expensive irrigation equipment, the system is very simple and effective at growing plants at a large or small scale under outdoor conditions. It is also perfect for people who want to start a small hydroponic business and then expand it as they want to increase their production, since adding channels is easy and requires almost no changes (besides perhaps having larger pumps and increasing reservoir size once this is required).


In the end I believe that this system summarizes everything that I wanted to achieve with an outdoor hydroponic system. It is able to control and measure the effect and added volume of rain, allows the growth of a large variety of plants and provides us with a cheap and scalable solution to small and large scale commercial growing. Definitely there will be some problems that will probably have to be solved once larger applications start to develop but certainly I can say right now that this idea seems to be the largest, cheapest and most scalable solution for outdoor hydroponic growing available online :o).