Hydroponic Nutrient Availability : What “Pushing Out an Element” Really Means
Plants need a very large variety of elements in order to grow successfully. In hydroponic crops we intend to provide all these elements in their different forms dissolved within our nutrient solutions. However the mechanisms by which plants absorb these elements is complex and there are many different factors that determine which elements are absorbed and which elements are not. On today’s post I will write a little bit about the problem of nutrient availability, what factors determine how ions are absorbed and what does it mean to “push an element out” when talking about a hydroponic system. First we will talk about the nature of the elements dissolved in hydroponics solutions followed by the importance of environmental conditions and nutrient interactions that finally determine the actual availability of nutrients for plant growth.
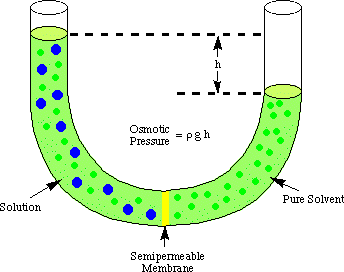
The first important thing we need to understand is that plants can absorb many different forms of the elements we need to provide and that these elements are not absorbed in their pure state but forming ionic entities dissolved within our solutions. For example nitrogen is absorbed by plants as the NO3(-) ion (nitrate) or as the NH4(+) ion (ammonium), both of these ions supply the plant with nitrogen but their overall effect is different and the ratio of their concentration has an important effect on plant growth and development. The second thing we need to understand is that plants can only absorb things that are dissolved in solution and that plants cannot absorb materials that are above a certain size. Although studies have shown that plants can take large particulate aggregates (such as polyoxometalates) it is true that large bulk solid materials of a few microns in diameter are already beyond the cellular absorption capacity of most plants. In order for something to get into a plant it needs to be dissolved in water, it needs to form the ionic entities which are assimilable by the plants.

The third and also probably least understood aspect of nutrient absorption is that the chemistry that leads to the entering of a nutrient within the plant cells must be favorable. What this means is that different conditions must be met so that plants can get their nutrients. There are many things that can cause this process to fail which may not be related with the nutrient itself but with the presence or absence of another nutrient. In plants there is an agonist/antagonist relationship between the different ionic species such that the excess or absence of one specie affects the absorption of another. For example iron is absorbed by plants as either Fe(2+) or Fe(3+) while phosphorous is generally absorbed as H2PO4(-) or HPO4(2-), when there is an excess of phosphate species the formation of iron-phosphate crystals can happen within the plant’s nutrient transport system causing what seems to appear as an iron deficiency. The problem is not caused by a lack of iron but by an excess of phosphate that hinders the mechanisms of absorption. Increasing iron concentration when this happens merely makes the problem worse as when phosphate concentrations lower an excessive iron concentration – now causing iron toxicity – is present.
The key to have a healthy plant with adequate absorption of nutrients is therefore to make all the necessary above mentioned conditions adequate. The first thing we need to do is guarantee that the nutrients we provide are in the adequate form (ionic species) and the second is that the conditions are adequate so that these species do not change but instead are absorbed. This leads us to the problem of “nutrient push-out” which is mentioned a lot within the hydroponic community. There are several environmental conditions that can cause the assimilable ionic forms of nutrients to change to something else therefore being “pushed out” of a solution. For example if you have high carbonate ion concentrations within your water the addition of your hydroponic nutrients can cause iron carbonate precipitation. This means that the previously dissolved iron (available as Fe(2+)) now becomes bound to carbonate ions forming a solid (FeCO3). This solid is very stable and hence doesn’t form aqueous ions but instead stays undissolved in the bottom of your nutrient solution. Other things such as an increase in pH (which precipitates metal oxides like Fe(OH)2) can also dramatically affect nutrient availability.
Many people tend to believe that calcium and sulfate precipitate easily but a careful analysis of the solubility behavior of calcium sulfate reveals that you would need a concentration of sulfur as sulfate of more than 400 ppm before any precipitation actually happens. In most cases precipitation can happen if concentrated solutions are mixed too quickly one after another – without adequate dissolution – or if a mix of solid nutrients is added to the reservoir. However this precipitate formed is often later dissolved with time as the aqueous solution reaches equilibrium.
In general when people refer to an element being “pushed out” they talk about the element being made unavailable to the plant through some mechanism generally involving the formation of a stable solid that cannot be used by the plants. The solid “drops out” of the hydroponic solution and therefore the term “pushed out” was born as a way to refer to this phenomena. Nonetheless it is always important to remember that other things can cause elements to become unavailable, such as temperature and the concentration level of other elements. In hydroponics we are dealing with a very complex interaction between ions and plants and our main goal is to keep the different nutrients balanced in such a way that most interactions are beneficial. Keeping an eye on temperature, pH, nutrient ratios and water quality is vital to achieve this desirable outcome.