My Hydroponic Calculator Tutorial : Saving and Loading Formulations and Recipes
First of all we need to make a clear distinction between what I call a “formulation” and what I call a “recipe”. A formulation is simply the group of desired values of concentrations you want to achieve for the different nutrients within your final nutrient solution. A formulation does not deal with weights or specific salts but it mainly specifies the concentrations of the different nutrients expressed as elemental ppm values within the solution. A recipe – on the other hand – includes the results of a calculation for a specific formulation, reservoir volume and a specific set of salts, the recipe tells you exactly how much of each salt you need to add in a given volume of water to prepare a given final or stock solution. So the formulation contains merely the concentrations you want to achieve while the recipe contains the amounts of salts needed to weight to achieve a given concentration on a given reservoir or stock solution setup.
–
–
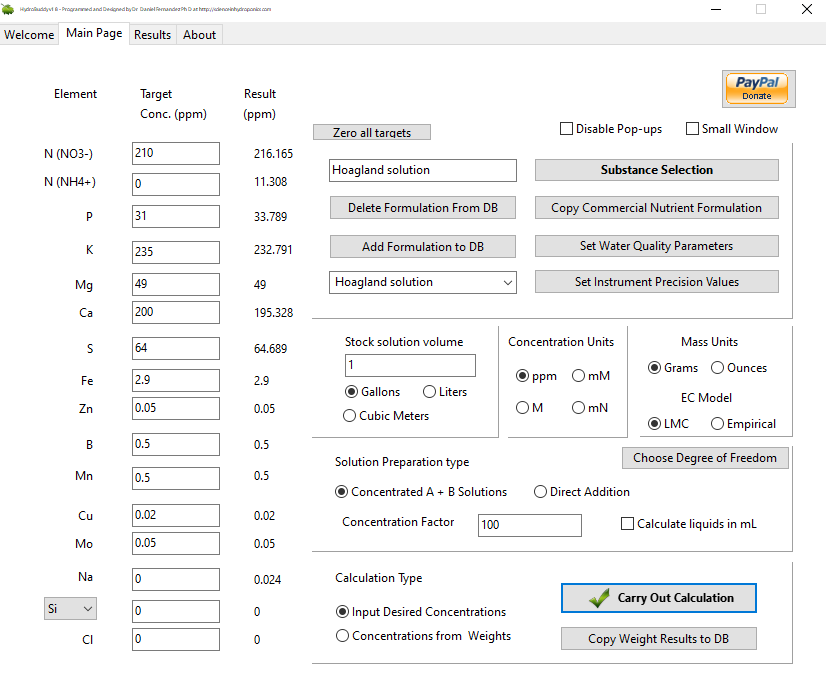
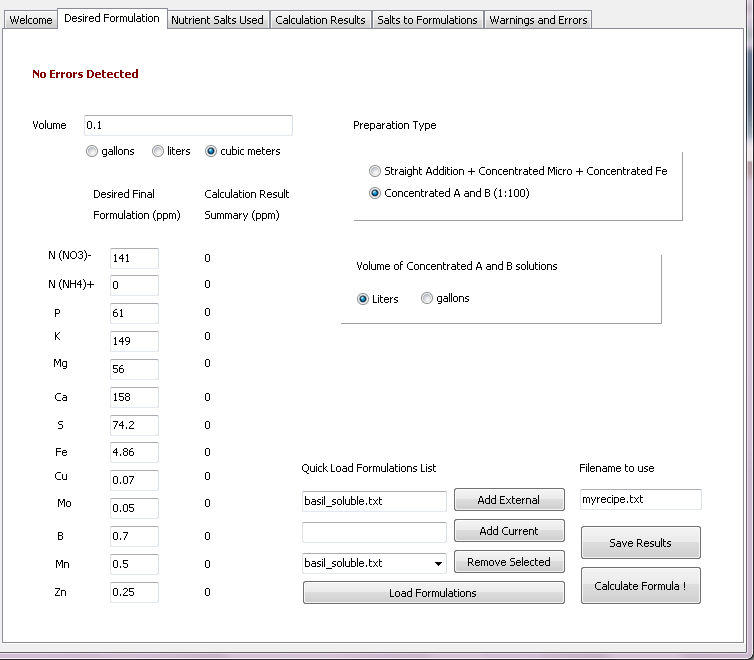
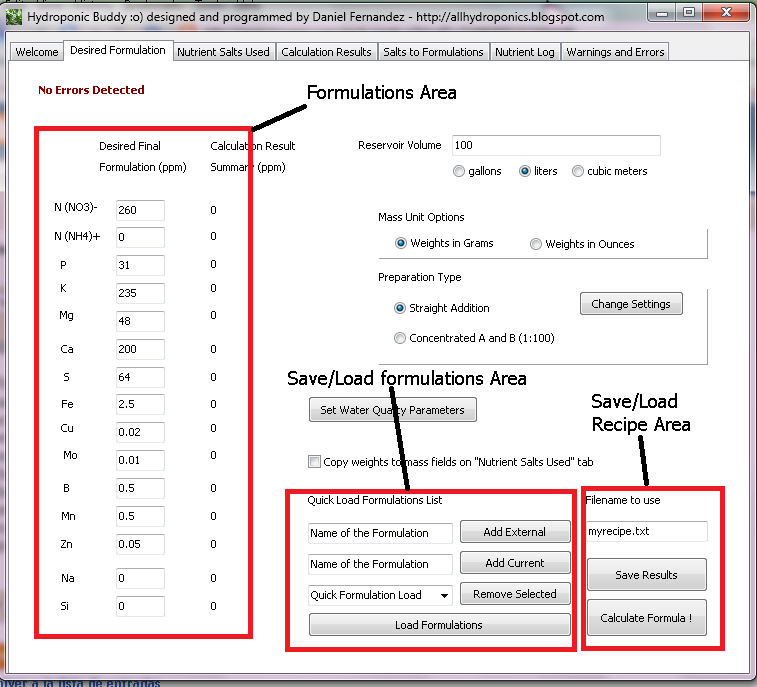
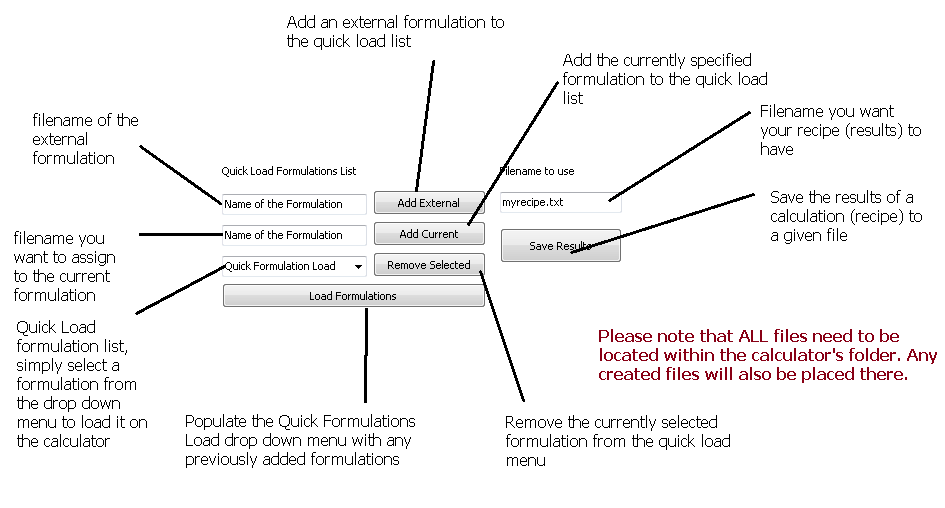
The image above shows you the areas within the calculator that deal with the inputting of the formulation, the saving/loading of formulations and the saving of recipes. After you specify a given formulation within the formulation area, you’ll be able to save it using the “Add Current” button, which simply adds your formulation to the “quick load list” drop down menu right below it. Additionally you can add an external formulation by inputting the exact filename next to the “Add External” button and clicking this button. Remember that any external formulation files you want to add must be placed in the exact same folder as the hydroponic calculator’s executable. Once you restart the program, the quick load list will be lost but you will be easily able to repopulate it using the “Load formulations” button which adds all the previously saved formulations to the quick load list.
One of the most useful features of this implementation is that you can easily share formulations with other people simply by sharing with them the files created by the calculator. When you use the “Add current” button, a file is created within the calculator’s folder containing all the necessary information for the calculator to interpret the formulation. If you want to share your formulation just send this file to the person you want to share it with and tell him or her to load it using the “add external” button and field after adding the file to the calculator’s folder.
– –
–
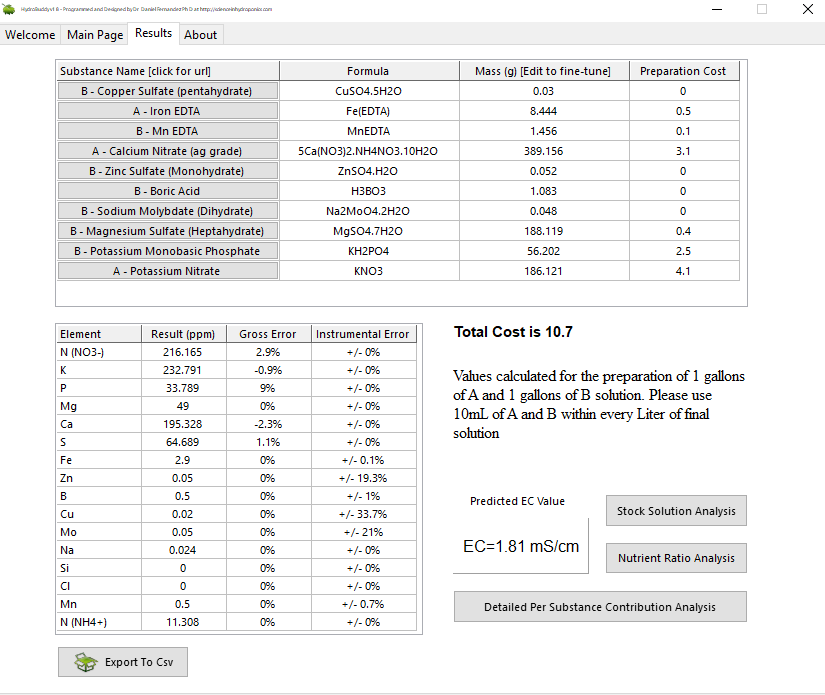
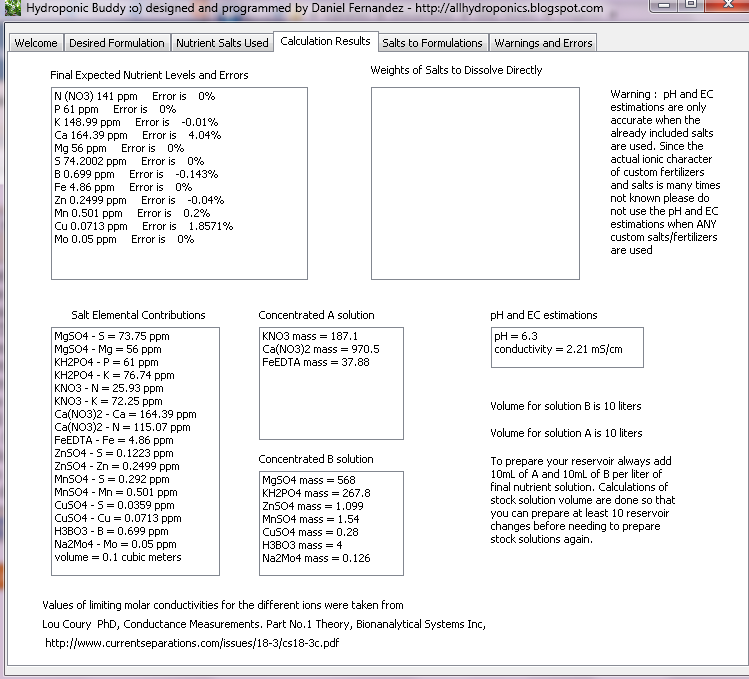
Another very interesting feature is the ability to save recipes. Once you select the salts and do the calculations for a given nutrient solution formulation you will be able to save all the results using the “Save Results” button. This creates a file within the calculator’s folder with all the necessary salt weights and instructions necessary to carry out the preparation. You can now print this file and use it when you are preparing the formulation or you can share it with others so that they will be able to reproduce your recipe with the exact same salt additions, volumes, etc.
As you see, the calculator provides you with a great set of features that allow you to easily save/load formulations and save and share recipes for hydroponic culture. Using the above mentioned features you should be able to save your formulations, save modifications of your formulations, quickly load formulations using the quick load menu, load external formulations onto the quick load list, save recipes and share your recipes and formulations with others around you who might also be interested in them. This is a great tool if you are sharing knowledge and the preparation of nutrients within a forum since others will be able to easily load and checkout your formulations and modifications without a lot of effort.