Static Hydroponic Systems, Cons and Pros

There are several systems available today in which hydroponic crops can be grown. All hydroponic systems can be divided into two main categories defined either as static or dynamic systems. In hydroponic dynamic systems the solutions is recirculated at some point by using a water pump while static systems neglect the use of a pump or any other way in which water can be recirculated.

Static hydroponic systems can then be divided into two large categories, open and closed systems. In open systems, the nutrient solution that is given to the plants is never recovered and is “wasted” while in closed systems the solution is used for as long as it has the right chemical properties to feed the plants. For example, a lettuce raft system with no water recirculation is considered a static closed system (since the solution stays in contact with the plant until it is not right anymore) while a drip irrigation system with no pumps is considered an open system because new solution is given to the plants continuously. I will now discuss some of the pros and cons of hydroponic static systems, both open and closed.

Open Static Hydroponic System

The largest advantage of open static hydroponic systems is that the cost and infrastructure needed to pump solution back into the nutrient reservoir is neglected, this cost can be significant if solution volumes are small. Another important advantage is that the concentration of nutrients and pH of the nutrient solution does not need to be checked because fresh solution is continuously provided.

The main drawbacks of this systems have to do with the cost of the nutrient solution spent and the dumping of hydroponic nutrient solution in either soil, rivers, or the sewage system. Hydroponic nutrient solutions are very contaminating because of the easiness with which they cause algae blooms. The solution needs to be correctly processed in order to guarantee no contamination occurs, doing this will most often require water pumps, something which makes the first advantages of these systems void. The cost of the nutrient solution also becomes prohibitive. A regular plant consumes about half a gallon per hour in a drip irrigation system, wasting this amount of solution every hour in a commercial facility is unacceptable (reason why no commercial growers use open static hydroponic systems).

Closed Static Hydroponic System

This systems have the advantage of not being contaminating and using nutrient solutions as effectively as possible. They are the most economical systems that can be built and they provide ideal growing conditions for most plants with short life cycles. Larger plants like tomatoes do not benefit from having their roots wet all the time and require some sort of special design within the system.

The main disadvantages of these systems have to do with the necessity for water oxygenation (using air pumps) and the need for continuous monitoring of the nutrient solution in order to guarantee that ideal conditions are always met. This of course, is not very complicated and can be done with no problems. Most commercial growers will couple the ideal of a static system with a dynamic one in order to further improve it’s effectiveness. For example, commercial lettuce raft growers often add water pumps in order to circulate, sterilize and oxygenate the water instead of using air pumps to do this.

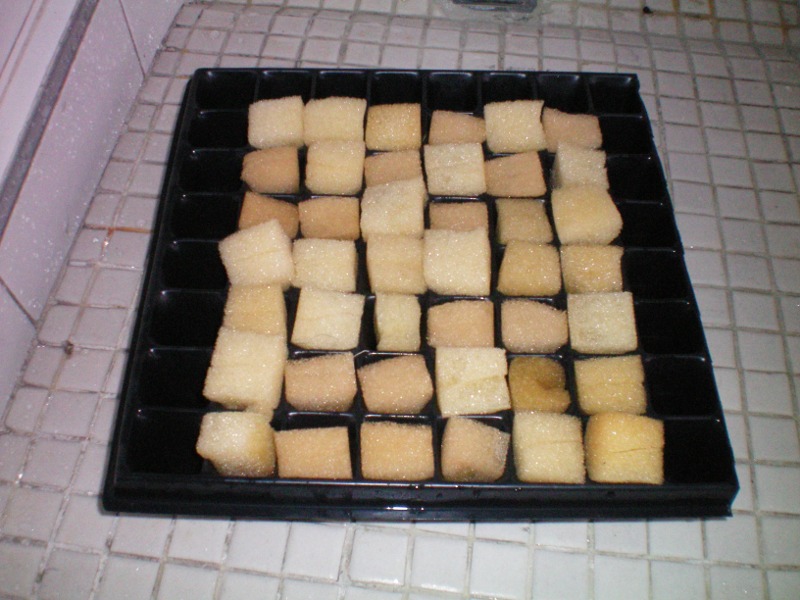
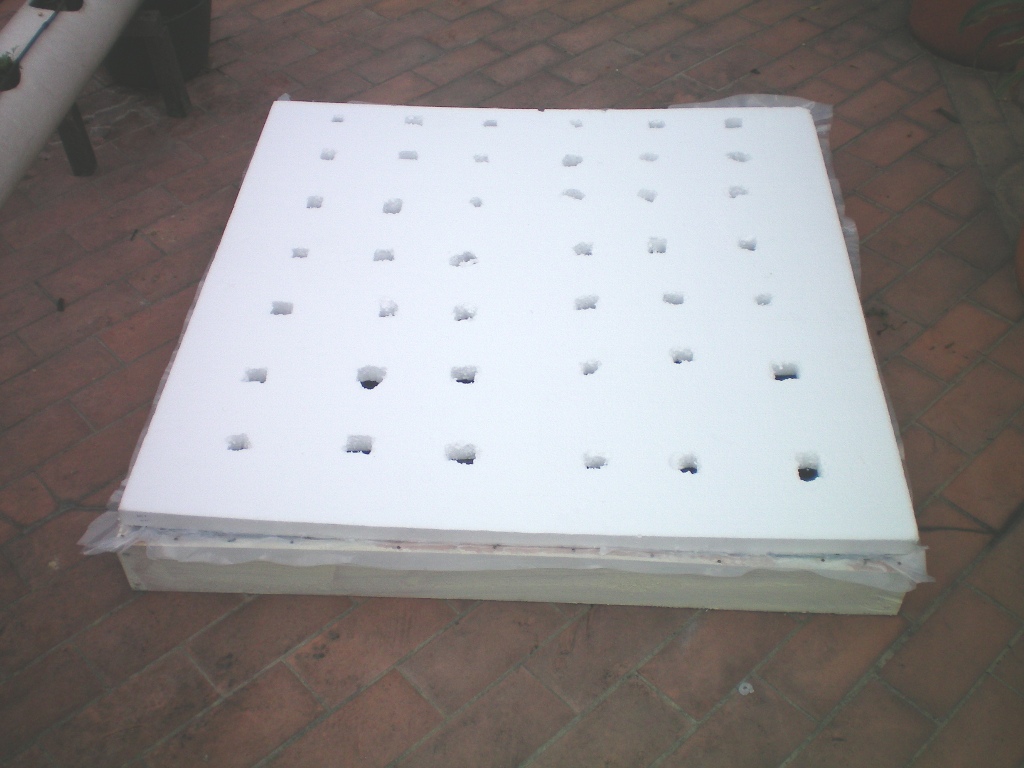
As you can see, most static hydroponic systems are pretty primitive and are often confined to small home growers whose concern with efficiency and optimal conditions is not as strict as those of commercial growers. Almost all commercial growers use dynamic systems of some sort and that should also be the aim of home growers as these systems have shown to be more efficient and ecological albeit more expensive than static cultivation methods.(Below, a closed static hydroponic system for herb cultivation)


Easy Seed Germination with Polyurethane Foam

Most hydroponic gardeners germinate their seeds using either a solid media such as perlite, vermiculite or coconut fibers or a woven media such as rock-wool. The first germination alternative has the problem of making transplant stress higher, while the second has the problem of being too expensive (for most hobby and commercial growers). With that in mind, I intend to explain on this post how to germinate your seeds using a cheap cube of polyurethane foam which is readily wet by the nutrient solution and generates almost no transplant stress when moving the plants.
The first step to germinate seeds in polyurethane foam is to buy a sheet of the adequate polyurethane. For this purpose, I use a polyurethane foam with a density of 0.015 grams per cubic centimeter. The next step is to cut the polyurethane foam in 1 inch by 1 inch by 1 inch cubes. After this is done, you have to make a cut with a sharp knife at one face of the foam cube (this is where the seed will be inserted).

Once your cube is cut and ready, you have to presoak it in water. Simply squeeze the cube under water and let it absorb all the liquid it can. Once you take it outside, do not squeeze it again since this will make the cube exchange the water it just absorbed for air.

Now simply deposit each seed inside a cube and place the cube in a tray for seed germination someplace where the appropriate conditions for the germination of your seeds are present. You can keep the seeds and the surface of the foam wet by misting water over the cubes everyday. Once the seeds germinate you can place them in your favorite hydroponic setup and the roots will grow out of the foam cube, into any solid media or nutrient solution. (below, an image of my germination setup ready for seed placing).


Salt Concentrations in Hydroponic Tomato Cultivation, More or Less ?

One of the most produced vegetables in hydroponic growing, both hobby and commercial, is the tomato. Because of this, and the very important place tomatoes have in world economy, many research efforts have been done towards the production of better quality crops. In hydroponics, much of this effort has been devoted towards the investigation of the optimum concentration levels of hydroponic tomato nutrient solutions. In particular, several researchers have studied how salt concentrations are associated with flavor in tomato crops.
Several peer reviewed studies have focused on this problem and many have drawn contradictory conclusions. Some studies suggest that higher EC levels are better for tomatoes while others sustain that it makes no difference in taste or nutrient composition but it decreases fruit size due to the higher osmotic pressure of the nutrient solution.

For example, a recent 2007 study, found out that tomatoes grown with an electrical conductivity of 2.3 and 4.5 dS/m had significantly different nutrient compositions and tastes with the tomatoes grown at 4.5 dS/m being far more tasteful and nutrient rich.

The difference seen amongst the studies is mainly because of the inherent composition of the nutrient solutions. Because different ions have different conductivities, some studies may show different results because of important changes in their nutrient compositions. Hence, even though conductivities are exactly the same, available ions to the plant are completely different. It can be seen that solutions that have higher potassium to nitrogen ratios and higher electrical conductivities prove to improve flavor consistently in hydroponic tomato crops.


Selenium in Hydroponic Growing of Lettuce

Hydroponic culture has a very good fame of giving optimal conditions for plant growth and nutrition. It is known that hydroponic crops grown with the best possible conditions can attain results far superior than those obtained with any form of soil gardening. However, the research community has just recently became aware that hydroponic growing may not only be used to provide the best conditions for growth but to enhance the plant’s nutritional values in ways that were not possible before.
So how do we enhance plants beyond what can be done with traditional hydroponics ? One way is to add certain non essential nutrients to the solution that can make the plants become more nutrient rich. This for example, can be done with the addition of selenium to certain plant cultures, specially lettuce.

Selenium (Se) is a chemical element which is essential to human life. Selenate, the chemical form in which Selenium is absorbed, is a powerful anti oxidant whose daily recommended value is rarely attained with traditional diets. By adding Selenate to the nutrient solution of hydroponic lettuce crops the plant’s Selenium content can be enhanced to supply the required daily values of Se.

Recent peer reviewed studies have shown that concentrations from 2 to 6 ppm of Selenate can increase the Selenium content of both lettuce and tomatoes as well as provide an important increase of other antioxidants in tomato crops. This is a clear example of how the inclusion of additional chemicals in the nutrient solution can enhance the nutritional quality of plants and make them go beyond what they would achieve under “optimum” natural conditions.(Below, the chemical structure of the Selenate anion)


Titanium Dioxide as a Disinfectant in Hydroponic Gardening

As I have said on previous posts, the problem of disinfection in hydroponic gardening continues to be a main issue in the area of soil less culture. Although there are many chemical solutions such as sodium hydrochloride and hydrogen peroxide, they continue to be non discriminant oxidants with the potential to damage roots and more importantly beneficial symbiotic microorganisms. Therefore, the use of chemical disinfectants takes away the possibility of using applications of beneficial organisms to boost crop yields.
Non chemical ways of disinfecting nutrient solutions do exists but are most of the time extremely expensive and only viable to large commercial growers. Examples of these are UV and ozone sterilization. Both processes are more friendly than chemical disinfectants and are friendly with root beneficial microorganisms, their only drawback is the high cost and difficulty of installation.

Nonetheless there is another potential way of sterilizing nutrient solutions which is both economically feasible for small growers and friendly with beneficial microorganisms that interact directly with plant roots. This new sterilization mechanism uses titanium dioxide as a mean of fighting pathogens inside the hydroponic nutrient solution.

Titanium dioxide is an innocuous, insoluble solid which is vastly used in the food and paint industry. Besides this, antase, a specific crystalline form of this material, has very interesting photocatalytic properties. For example, when irradiated with UV rays (the sun’s being enough) antase is able to decompose organic matter into non harmful chemicals. It has been widely studied as a means of replacing hypochloride in water treatment plants and now offers a great way to sterilize nutrient solutions in hydroponic growing.

Degussa P25, an anatase containing nano crystalline commercial form of titanium dioxide, is very cheap and adequate for it’s use as a sterilizer in hydroponic growing. Simply, the solution is passed through a shallow open container that has several tiles of cheap glass covered with a small layer of sinthered Degussa P25. This sterilizer can eliminate microorganism spores, bacteria, etc, from the nutrient solution while keeping costs and chemical disinfection down to a minimum. This is something I am going to try in the near future so stay tuned to see my results ! (below, a SEM image of titanium dioxide nano particles)


Checking the pH of your Hydroponic System, The Easy Way !

Growers often think that they need to buy pH meters in order to accurately control the pH level of their hydroponic nutrient solution. Actually, there are a couple of ways in which pH can be readily monitored without any digital equipment. One of the cheapest ways in which this can be done is through the use of an acid base indicator.
An acid base indicator is a substance whose protonated and deprotonated molecular forms have different electronic structures with different spectroscopic properties. Therefore, an acid base indicator changes it’s color according to the pH value of the solution and this color change can tell us if the pH of our nutrient solution is right or wrong.

Every indicator has it’s own characteristic proton affinity which means that it changes at a different pH value. Since the optimal pH in hydroponic growing for most species is between 5.5 and 6.5, we will use an indicator that changes around this value and can tell us if the nutrient solution differs from the ideal setup.

The indicator which best suites our needs is Chlorophenol Red. This substance changes color from yellow (pH 4.8) to red (6.4) (wikipedia is wrong about it changing to violet !), at the pH of our interest, which is 5.5-6.0, the indicator is orange. You can buy an already prepared solution of the indicator ready for testing here. A 100mL solution will allow you to perform thousands of tests at 1/10th of the cost of a regular pH meter.

In order to test the pH, add about two tablespoons of the nutrient solution inside a transparent glass, then add two or three drops of the indicator, mix and watch the results. If the indicator is either red or yellow, you are off the desired value. If the solution turns orange, your nutrient solution’s pH is just about right ! (Below, the color change of the indicator as a function of pH, notice that the orange region is precisely around 5.5-6.0 .


Building a Cheap System to Grow Hydroponic Lettuce

In an earlier post, I talked about a static hydroponic lettuce system that needed no aeration or recirculation and worked by providing an air space between the nutrient solution and the plants. Today I am going to explain how to build this very simple system from cheap materials. These are the things you will need :
– 8 Nails – 2 inches (5cm) long
– 40 Nails – 1 inch (2.5cm) long
– 4 wooden boards – 100 x 10 x 2cm
– Plastic lining (greenhouse polyethylene) – 1.20m x 1.20m
– Knife
– Styrofoam board – 100 x 100 x 2 cm
– Silicon Paste Sealant
– 1/4 gallon white latex paint
– painting brush

The first thing you need to do is nail the boards together forming a 1 x 1m frame. To do this I used 8 large Nails.


After the boards are nailed together (like it is shown above) paint the outside using white latex paint. This provides protection for the wood from water, light, bacterial and fungal damage. Now line the frame with the plastic, nailing it on the borders using small nails.


Your system should look like the one shown above. After this part, we need to build the cover of the system that will hold the lettuce plants. Cut 42 2×2 cm holes on your Styrofoam board in a 6 x 7 fashion, keeping a distance of 12 cm between holes. This is shown below.

Now you need to glue this Styrofoam piece on top of the frame you built before. Do this using silicon paste, taking care to afford a good seal along the whole structure. This will prevent light from reaching the nutrient solution. The holes are fit to accommodate 42 plants (but you may do less holes if you desire to nurture less plants) germinated in polyurethane foam. Later this week I will continue to explain how plants need to be germinated and transplanted in order to use this system and how the nutrient solution is used and replaced. Below, a picture of the finished system (total cost for me, 25 USD).


My pH Balancing System for Hydroponic Growing

In the past few days, several people have asked me how to use my carbonate/citrate buffering system as a means to control the pH of their nutrient solutions. For this reason, I decided to write a post which explains the simple way in which my buffering system can be prepared and a little more about how it works and what you can expect from it.

A pH buffer’s function is to provide reaction “alternatives” for strong acids and bases when they contact the nutrient solution. These acid or basic substances generally react with water and this changes the value of pH. When a buffer is present, they react with the buffering molecules instead of water. This of course, makes pH remain approximately constant. Since the generation of species can be perfectly controlled and predicted by the use of mathematical methods, we can create very good buffering system by “experimenting” with different substances using a computer, as I mentioned in an earlier post.

As a result of my simulations I concluded that a mixture of citric acid/carbonate acts as a good buffer in hydroponics both towards the addition of acids and bases. The actual species involved are citrate and the bicarbonate ion, the bicarbonate ion reacts with acids, providing basic pH buffering, while the citrate reacts with acids providing an acid range buffering effect.

It is very easy to use this system by using your regular pH meter. Prepare your nutrient solution as usual, at the end, add 5g of citric acid for 500 liters of solution (this will acidify the pH of your solution a lot). Now, take back the pH to the value you want (5.8 to 6.2) by adding potassium carbonate. It is important not to use bicarbonate as this will react quickly with citric acid to form carbonic acid and then carbon dioxide (which will leave as a gas !). Also make sure you add both chemicals previously dissolved in water to afford quick chemical equilibrium achievement inside the solution.

By using this method you will have a nutrient solution that is perfectly buffered at your desired pH and that will remain at that pH value for a good amount of time. This of course, depending on the solution’s volume and the type and number of plants you grow with it. (below, the distribution of species diagram or the carbonate family)


One Plant Hydroponic System, Wick Growing

Most hydroponic systems today are a fairly complicated combination of holding materials, irrigation systems, aeration pumps, etc. For most people wanting to grow a single plant in hydroponics it has become quiet impossible to figure out where to find a cheap system to do so.
One of the cheapest systems available for hydroponic gardening of small plants (ideal for experimentation and school projects) is the hydroponic wick nutrient system. This system uses an absorbent fiber to carry on nutrient solution by capillary action towards the plant which usually rests above it. Wick systems are very easily built and are a very good fit for the growing of small plants.

Medium sized and large sized plants start to have problems with hydroponic wick systems due to the inherent capillary flow limitations that physics impose on the flow of nutrient solution. The absorbent fibers on capillary systems are also often clogged because of nutrient salt buildup (due to water evaporation because of the large surface area of the fibers). Water evaporation increases the concentration of salts along the fiber and starts to precipitate insoluble calcium and other metal phosphates. These are very hard to redissolve and often cause the system to stop working.

However, as I said before, wick systems such as the one built here are very appropriate for experimentation, growing a single hydroponic plant or doing school projects. The system is very easy and cheap to build.(below, a photograph of plants being grown on this system, note that they are very etiolated due to lack of proper lighting)


Outdoor Hydroponics, Growing Without a Greenhouse

Most hydroponic gardening techniques demand strict control over the growing media and ambient variables in order to have a crop in optimum conditions. However, most small hobby and commercial hydroponic gardeners do not have the budget necessary to build a greenhouse and need to have their systems exposed to the elements. This is why I decided to write a post about growing hydroponic plants in outdoor conditions, to show growers that hydroponics can be grown outside if adequate precautions are taken.
So what is the problem with the outdoors ? Well, the main problems are temperature changes, rain, haze, snow and excess light. Plants grown outside a greenhouse do not have any protection against direct sun, rain, haze or snow and are therefore most likely to be damaged by the elements. This of course, does not mean that the crops cannot be taken outside.

In countries where there are four seasons (and winter has snow), care needs to be taken not to grow any plants during the winter, because snow will most likely kill all the crops. furthermore, low temperatures are likely to freeze the nutrient solution, something that can be a really bad problem in a hydroponic garden.

Another precaution that needs to be taken is to be specially watchful of the levels of EC in the hydroponics garden. In this special case, nutrients need to added in order to compensate for dilutions caused by rain. Electrical conductivity levels need to be taken before and after a rain storm in order to know the change in EC and return it to normal after. Note that this is a special case, normally nutrients should never be added to a solution which was naturally depleted by the plants. Please read the EC FAQ post for more information about this.

Another important thing is that plants should be protected from excessive evaporation by using hydro-gels. These polymers are applied over the plants root ball and effectively retain moisture for the plant so that possible stress from excessive evaporation becomes minimal. If the sun is too strong, additional measures such as nutrient reservoir cooling (with ice for example) have to be done in order to maintain adequate temperatures around the root zone.

It is clear that hydroponic crops can be grown outside but growers have to take special precautions with this area of hydroponics and commercial growers using this technique should have the losing of one crop a year in their budget (for crops such as lettuces) due to ambient conditions ruining their growth. (below, an image from a special program done by the UN to help poor people use hydroponics as a stable source of income)