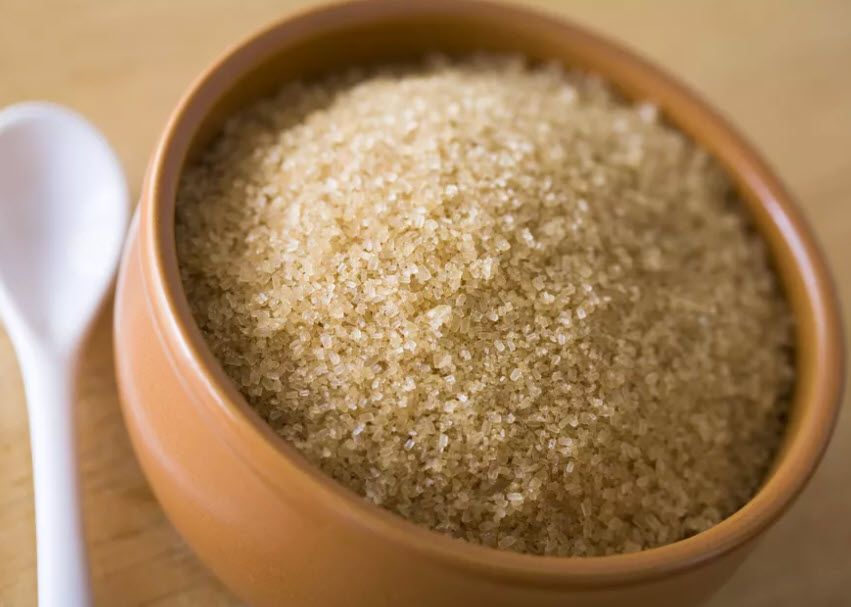
Sugars in hydroponic nutrient solutions

Carbohydrates are an integral part of plants. They produce them from carbon dioxide, requiring no additional external carbon inputs for the process. However, since plants can absorb molecules through their leaves and roots, it is perhaps natural to wonder whether they could also get carbohydrates through the roots and avoid some of the stress they go through in order to produce these molecules from scratch. If plants can uptake sugar and we feed them sugars then will we get fruits with more sugars and bigger plants? It’s an interesting question that I will try to answer within this post, looking at the potential use of simple sugars within hydroponic nutrient solutions.

Simple table sucrose

Although the above idea sounds straightforward, it hardly has any interest in the scientific literature or the commercial hydroponic industry. You will find no significant number of research papers studying the use of sugars – simple or complex – in hydroponic nutrient solutions and very few studies looking at sugar uptake and the interactions of in-vitro plant tissue with simple sugars. This lack of interest and use is no accident, it comes from an already established understanding of plant physiology and the realization that it is not cost effective, useful or needed to add sugars to nutrient solutions.

Let us start with what we know about the subject. We know that plants exude very significant amount of sugars through their root systems and we also know that they can re-uptake some of these sugars through their roots (see here). From this paper it seems that maize plants could uptake up to 10% of the sugars they exude back into their root systems, which implies that some exogenous sugar application could find its way into plant roots. Even worse, transporting this sugar up to the shoots is extremely inefficient, with only 0.6% of the sugar making it up the plant. This tells us that most of the sugar is wasted in terms of plant usage, a large majority never makes it into the plant and the little amount that makes it actually never goes up the plant. Plants are simply not built to transport sugars in this manner, they evolved to transport sugars down to roots and to fruits.

But what about the roots? Given that the plant tissue that would be in direct contact with the sugar is the roots, it is logical to think about positive effects affecting them primarily. We have some studies about the influence of sugar solutions in seedlings (like this one) which does show that sugars can stimulate the growth of new root tissue in very small plants. However in large plants most of the sugar content in the roots will come from transport from the higher parts of the plant and the local sugar concentration will be low. Seedlings can likely benefit from sugars in the roots because leaves are producing very little at this time but larger plants are unlikely to benefit from this effect.

There is however one effect that sugars have that is very clear, they feed the rhizosphere around the plant’s roots. Although plants try to care about this themselves – by exuding an important amount of sugars and organic acids – an exogenous sugar addition would most likely boost the amount of microbes around plant roots (both good and bad ones). The profile of sugars and acids exuded by plants is most likely tuned by evolution to match the microbes that are most beneficial to it and an unintended and negative effect of sugars is to boost all microbe populations at the same time, regardless of whether they are good or bad for the plant. This also increases oxygen demand around roots – because aerobic microbes will want to oxidize these sugars – reducing the amount of oxygen available to plant roots. For this reason, any application of a sugar to a nutrient solution requires the inoculation of the desired microbes beforehand, to ensure no bad actors take hold. It also requires the use of a media with very high aeration, to prevent problems caused by oxygen deprivation.

Sadly there aren’t any peer reviewed papers – at least that I could find – investigating the effect of exogenous sugars on the yields of any plant specie in a hydroponic environment. Given our understanding of plant physiology, any positive effects related with anecdotal use of sugars are most likely related with positive effects in the rhizosphere that are linked with improved production of substances that elicit plant growth in the root zone by favorable microbes. This is mainly because it is already well established that transport of sugars within plants from the roots to the shoots is incredibly inefficient, so any contribution of the roots to sugar uptake will be completely dwarfed by the actual production of sugars from carbon dioxide in the upper parts of the plant. It is not surprising that no one seems to want to do a peer reviewed study of a phenomenon whose outcome is already largely predictable from the accepted scientific literature.

If you’re interested in the use of sugars in hydroponics, it is probably more fruitful to focus on microbe inoculations instead. Sugars themselves are bound to provide no benefit if they are not coupled with a proper microbe population and, even then, you might actually have all the benefits without any sugar applications as the microbes can be selected and fed by plant root exudates themselves in mature plants although sugars might provide some benefits in jump starting these populations, particularly in younger plants. Also, bear in mind that there is also a very high risk of stimulating bad microbes with the use of sugars, especially if oxygenation is not very high.


Controlling pH in hydroponics using only electricity

The ability of plants to assimilate nutrients changes as a function of pH. This makes maintaining the pH of nutrient solutions within an acceptable range – most commonly 5.8 to 6.2 – one of the most important tasks in a hydroponic crop. This is commonly done with the addition of strong acids or bases to decrease or increase the pH when it drifts away from the intended value. This requires either manual monitoring with careful addition of these substances or automated processes using pumps to ensure the pH always remains at the correct value. However both of these methods lack fine control, require a lot of maintenance and monitoring and can lead to costly mistakes. Today I want to discuss an alternative method that relies on a completely different idea to control pH, the idea that we can oxidize or reduce water using electricity to achieve changes in pH. Yes, you can change pH using literally only electricity.

A modern anion exchange membrane. Fundamental to the idea of an electricty-only pH control system

Let’s start by discussing pH and talking about how it is changes. The pH of a solution is calculated as -Log(|H+|) where |H+| is the molar concentration of H+ ions in solution. In water, the dissociation constant 1×10-14 (at 25C), always needs to be respected, so we always know that the product of |H+| and |OH| needs to give us this number. When you add acids you increase |H+| conversely |OH| decreases and the pH goes down, when you add bases |OH-| increases, |H+| decreases and the pH goes up. In simpler terms everything you need to decrease pH is a source of H+ and everything you need to increase pH is a source of OH.

This is where electrochemisty gives us the simplest solution we could hope for. Water can be oxidized or reduced. When you run a current through water – above the minimum required voltage – water splits into hydrogen and oxygen molecules. In the image below you can see how the water oxidation reaction generates H+ ions while the reaction on the right generates OH- ions. When you do this in a single cell – as shown below – the H+ ions generated at the anode react with the OH- ions generated at the cathode and the pH of the solution remains neutral while oxygen is produced at the anode and hydrogen is produced at the cathode.

<img src="https://scienceinhydroponics.com/wp-content/uploads/2020/04/electrolysis_water.gif" alt="Electrolytic Cells  cell > 0  cell < 0  G
The image above shows the half reactions involved in the oxidation (left) and reduction (right) of water.

However, we can take advantage of ion exchange membranes to separate these two processes, allowing us to control where each reaction happens and where the acid or base is generated (preventing them from just mixing and neutralizing). As a matter of fact, all we need is to have an electrode in our nutrient solution and another electrode in an auxiliary cell, separated from our nutrient solution by an ion exchange membrane. This concept is actually not new and was already proposed in a 1998 paper to control pH in hydroponic systems. Although it was never tried in a production system, all the concepts were validated and were shown to perform adequately in test solutions.

Image taken from this paper, which discussed the topic of electrochemical pH control in hydroponic systems at length.

One of the big challenges of this setup is that the cathode side involves hydrogen gas evolution – which could be dangerous – but can be completely avoided by replacing the cathode’s half reaction with much more benign chemistry. As an example – also suggested in the paper above – you can replace the cathode half-cell with a copper sulfate solution with a copper electrode, with an anion exchange membrane. This would allow you to have your reduction reaction be the reduction of copper onto a copper place, which is a very tame reaction. Since the membrane only exchanges anions you would only have sulfate go to your nutrient solution, which is a benign anion in hydroponic culture. This of course means that your half-cell electrode and solution would need to be replaced with time, but this is completely independent from the control process (much more like refilling a tank of gas). The anode would only evolve oxygen in your nutrient solution, which is a potentially beneficial side effect.

Using a copper sulfate half-cell would however limit the control system to lower pH but this is not a problem since this is the most commonly used operation in hydroponics (very rarely do people have to increase the pH of their solutions). If a proper venting system or catalytic recombination system is used on the cathode side you could also go with the simple water oxidation/reduction route and be able to increase or decrease the pH using basically, pure electricity.

I am definitely planning to build one of this setups in the future. Coupled with modern sensors and micro controllers this could make it extremely easy to maintain very fine control over the pH of the solution, compensating – in real time – all the changes in pH carried out by plants without the risk of heavily over or under compensating (as it happens when you use acid/base additions).


The media exchange solution test: A better measurement of media effects in hydroponics

In the traditional hydroponic paradigm we want media to be as chemically inert as possible. The ideal media in this view would absorb no nutrients, give off no nutrients and would not decompose or react with the nutrient solution in any way. However none of the commonly available media sources comply with these properties, reason why we must be vigilant and properly adjust the media we use to fit the needs of our hydroponic setup. In this article I am going to talk about the idea of using a direct comparison test of the nutrient solution against the media, to understand the effect the media will have when exposed to the target nutrients and how this can help us adjust our solutions to better play with the selected growing medium.

Different types of growing media

First, let us understand how the media interacts with a hydroponic solution. The media can do all of the following things:

  • Dissolve into the solution (this is what happens if your media is something like sand or limestone). In this case the media is chemically reacting with the nutrient solution, therefore media is being irreversibly lost in the process. This can happen very fast, with something like limestone, or very slowly, with something like sand.
  • React and take something away from the solution. In this case the media can use ions within the solution to perform reactions that create new substances that are insoluble. For example if you have media containing large amounts of rock phosphate this phosphate can cause the precipitation of heavy metal phosphates.
  • Release ions in exchangeable locations into the media. This is different than dissolving because the media is not getting destroyed in the process but it is emptying “storage sites” that contain some ions that prefer the solution instead of these sites. This process is fundamentally reversible and – under the proper conditions – these sites could be replenished with the same or different ions.
  • Take ions into exchangeable locations in the media. This is the opposite of the process above. In this case the media will receive some ions into “storage sites” because these ions prefer the media to the hydroponic solution. The solution will therefore be depleted of these ions because they are being stored within the media.

Of most interest to us are the third and fourth points above, this is generally understood as the “exchange capacity” of the media. This determines how many and which nutrients the media can store. Different media can have storage sites with different affinities and in hydroponic setups we generally want to aim for the minimum energy state of these storage sites as they relate to our nutrient solution. Media that is already in equilibrium with the nutrient solution will tend not to change it while media that is far away from equilibrium with the solution will change it strongly towards the equilibrium point.

Think about coco coir, a commonly used media in hydroponics that can have a wide variety of different ion exchange capacity values and a lot of different ions initially in its “storage sites” due to the differences in sourcing materials and treatments done by different companies. Coco coir initially contains high amounts of potassium and sodium ions, but some companies treat it with Ca nitrate, which changes all these “storage sites” to contain Ca instead. These two sources of coco would interact very differently with our nutrient solution. In the first case the coir would exchange a lot of its potassium for Ca and Mg ions in solution – because these ions have higher affinity for the “storage sites” – while in the second case a little Ca would be exchanged for other ions (because all ions are in equilibrium with all the storage sites). The changes to the solution are very different and totally different approaches in nutrient composition changes are required.

Traditional soil tests could provide some answer to us, they would definitely show the ions that could be exchanged to be different in both cases. But they tell us little about the equilibrium position of the media against our target nutrient solution. To make things more realistic we can actually do a test where we pass our actual nutrient solution through a column of media that is exactly what we’re going to run it through in real life (with no plants of course). We then collect the input and output solution and run lab analysis of both of these solutions. We can then compare the results and see how much the media is actually changing the composition of our input solution and we can then make some decision to adjust. Such a test would proceed as follows:

  1. Prepare the strongest final solution that will be used in the growing process. (for example the solution that is used at the peak of fruit generation in a tomato crop)
  2. Take a sample of this starting solution to send for chemical analysis.
  3. Pack a burette with a column of media as high as the containers the plants will be in.
  4. Fill the burette with the nutrient solution.
  5. Run as much solution as required to collect a sample of equal volume to the first one.
  6. Send both samples for analysis.

The difference in nutrients between both solution will show us what we should initially be doing to maintain a consistent composition of the nutrient solution, given the interaction with the media. If the interaction is too strong it can also tell us that we shouldn’t be using this media without previously treating it to ensure the imbalances do not happen. For example media like biochar can have an extremely high affinity for metal chelates and nitrogen compounds, if we ran our solution through the media and it turns out that it soaked up almost all of our iron and ammonium, we wouldn’t want to just add more nitrate and heavy metals but we would like to pretreat the media with a concentrated solution and then repeat the test to ensure that the media is at a level of activity that we can correct for.

A given media source that is acceptable should not strongly affect the nutrient solution. Any media that does this in the media exchange test requires correction so that the ability to take elements from the nutrient solution is reduced. The test will tell you exactly what the media is finding most appetizing and the treatment options will then be substantially easier to plan. A coco coir that shows it soaks up almost all the Ca will need to be treated with a Ca nitrate solution and a biochar that absorbs a lot of ammonium will need to be treated with an ammonium sulfate solution. These are some cheap pretreatments that will save a lot of heartache within a hydroponic setup and will make the ongoing growing process substantially easier to manage.

This is one of the simplest and cheapest tests that can be done to address media effects. However it is by no means comprehensive in that it does not show us other important media properties that might be crucial for selection. It is important to consider that this test gives us only a glimpse of the chemical properties and the interactions with the actual nutrient solution we intend to use. Other media specific analysis and more complicated media run-off tests can be necessary to address the full extent of the interactions through an entire crop cycle.


Why you should optimize your nutrient solution for your particular setup

In hydroponics, most plant nourishment is delivered through the use of a nutrient solution. This solution is prepared from raw fertilizer inputs by the grower – or a fertilizer company – and should contain adequate mineral ratios to maximize plant growth. However, although basic solutions can successfully grow crops under a wide variety of conditions, large increases in yields are possible with the optimization of the nutrient solution for each particular setup. Today’s article talks about why this is important and why a one-size-fits-all solution simply does not exist in hydroponic culture.

A nutrient solution is, generally, a very complicated mixture of different substances. All solutions should contain all mineral elements that are necessary for plant growth, which means that every solution contains at least 13 variables that a grower can change in order to improve their crop yields. You may think that every plant species has a magic set of variables that provide the best results but – in reality – this does not happen because plant/nutrient dynamics depend on the growing environment as well.

Since nutrients in solution are absorbed through plant roots, the root environment plays a huge role in determining how nutrients get absorbed by plants. The root environment depends on the media being used, the temperature and the way that water cycles in and out of the media. Nutrients are not absorbed in the same manner in a crop where watering is done once every 12 hours compared with a crop where constant dripping over the media is maintained. The nutrient solution also interacts with the media with time and different things can buildup depending on the frequency of the waterings, how well oxygenated the nutrient solution is and how the nutrient solution interacts with the specific media being used.

The outside environment also plays a huge role, due to the way that mineral transport is tied to water transport within plants. An environment with a high vapor pressure deficit will increase water transport through the plant, which will significantly increase Ca transport, while a higher moisture environment will hinder Ca transport and increase the transport of other minerals. The amount of air movement around the canopy, the concentration of carbon dioxide and the amount of temperature variation also play a huge role in determining what nutrient ratios will work best for a particular growing setup.

Sadly, no two growers ever have the exact same root and outside environment conditions. The optimal solution for a grower using coco coir in a high VPD environment will be very different from the solution used by someone using rockwool under low VPD, even if both people are growing the exact same plant. For this reason, performing a proper optimization of the nutrient solution is fundamental to increase nutrient usage efficiency and maximize growth. I will write more about how this is done in practice next week.

If you would like to know more about how this can be done in practice in your commercial hydroponic crop, please do not hesitate to send me an email, using the contact form on this page.


High P or low P? The mystery of phosphorus in hydroponic culture

If you searched for the optimal P concentration for plant growth in hydroponics you will likely find very different results, ranging from low values to very high values. This is inherently contradictory and difficult to understand, why don’t we have a smaller range for optimal P conditions? Why has it been so hard to describe what the best P levels are? Today we will talk about P nutrition and why there has been so much confusion regarding optimal P levels in hydroponic culture.

Effects of P and N concentration on lavender plants (taken from this article)

Almost all books about hydroponics and flowering plants will put optimal P concentrations in solution between 20 and 50 ppm, rarely will you find any book recommending P levels outside of these values in general, since these are recognized to be safe and they play well with standard nutrient concentrations used for other elements. However you will find articles for different plants recommending P levels that can be as high as 200 ppm to as low as 10 ppm. Take for example this article on Calendula, which recommend a P application of 10ppm, while this article on Lavender suggests 60ppm. Note that optimal P might also depend on the desired result as this article on Origanum dictamnus shows that there is a movements of essential oils from leaves to bracts at higher P concentrations in these plants.

Not only is there confusion about optimal P levels, but even the effects of P and the interaction of P with micronutrients are not very well understood. There is evidence (see here) that P promotes Mn uptake in tomatoes while it suppresses Fe and Zn uptake, while we have entirely different results in barley, where P is found to actually impede manganese acquisition. The above two articles also give a lot of references to P uptake literature, which I suggest you checkout if you would like to learn more.

Table taken from this article
Taken from this thesis.

The P literature is quite extensive (I suggest you read this thesis and its references if you would like to get a deeper dive), but overall we know that concentrations below 20ppm are rarely optimal and we do know that levels above 60ppm can be optimal for some plants under some conditions. In the thesis mentioned above we can see that tabasco pepper plants have the highest leaf area after 90 days in a P solution at almost 120 ppm.

Optimal P levels are perhaps harder to evaluate because they depend substantially on the concentration of other elements in solution as well as solution pH and root zone temperatures. We know that lower P stimulates root growth and reduces shoot growth while higher P levels have the exact opposite effect. Therefore variations in the ratio of P to other nutrients might be the optimal path for many crops but this is very hard to generalize as it depends on the particular growing conditions of each particular crop being grown.

Sadly the answer is that we don’t have an “optimal P” that will match all growing conditions and plants. We know that growing with a P value between 30-50ppm will give you decent results on almost all crops, but we also know that there are substantial gains to be made by optimizing P under your particular growing conditions (plant, media, tempeatures, etc). In some cases 50%+ increases in yields might be possible if P is properly tuned to the exact growing conditions used.

Your optimal P might be way lower or higher than what’s recommended in the literature, so start with the ballpark literature recommendation and make experiments from there to properly adjust P to maximize yields in your crop. Also make sure you carry out leaf-tissue, media and run-off analysis while you do this to ensure you get the best possible results.


Using a biodegradable iron chelate (IDHA) in hydroponics

Chelates are a very important part of hydroponic nutrient solutions as they provide a reliable source of heavy metals. Without chelates, heavy metals can easily go out of solution and become unavailable, either because they precipitate as an insoluble salt or because they are captured by active surfaces with a high affinity for metals. Among the heavy metals, Fe is the most important to chelate as it’s usually present in the largest concentration and is the most easily taken out of solution by the factors mentioned above.

Models for different Fe chelating agents, taken from this paper.

Commonly chelating agents such as EDTA, DTPA and EDDHA are used in solution and they do a great job in providing adequate supplies of micro nutrients to plants. These three chelators have a very high affinity for Fe and therefore ensure that Fe will remain in solution and available to plants. However, a problem all of these chelating agents share is their lack of biodegradability, they all enter plant tissue and are going to be very difficult to get rid of by the plant. They can therefore accumulate in plant tissues to some extent and can cause problems of their own.

There are however some chelating agents that are both effective at protecting the heavy metals and easily biodegradable, from these, the most largely studied is perhaps imidodisuccinic acid (IDHA) whose structure is showed and compared with the other chelates in the image above. Although this chelating agent shares some common structural features with traditional chelating agents its chemical structure makes it incredibly easy to biodegrade and therefore a nice candidate for fertilizer use.

Comparison between EDTA, IDHA and a control, taken from this paper

Several papers have compared IDHA fertilization to traditional Fe chelates (here, here, here, here). Although the IDHA is usually less stable in solution – as it would be expected given its chemical nature – it tends to give better results in terms of absorption and fertilization compared with the other Fe chelates. Given that it is also completely non-toxic to the plants – while the other chelates make the plant deal with the non-biodegradable aspects – plants fertilized with IDHA can actually be healthier. The image above, showing a comparison with EDTA – shows how the IDHA plants were not affected by a fungal infection that ended up affecting the EDTA treatment.

This does not mean that IDHA is the natural best choice for an Fe chelate. Some of the above studies have shown that IDHA can easily be captured by some media and its lack of stability implies that it is not a good choice for extended use in recirculating systems. However IDHA can be a better choice if the media used allows for it and the grower is able to apply it with its biodegradable nature in mind or if the desired products needs to be free of traditional chelate contaminants. In some cases – as mentioned before – it can actually be a significant improvement over traditional chelates.


Selenium in hydroponic culture

The element selenium (Se) is not commonly used in hydroponic culture – as it’s not necessary for plant life – but the fact that it’s necessary for human life has meant that plant enrichment with selenium and its effects have been studied in hydroponics. Its effects however, are more than just an increase in Se concentration in plants. In today’s post we’ll talk about Se and what its effects in plant growth are according to some of the published literature.

Correlation map of all measured plant properties in Se application (from this study)

Different studies can use different forms of Se, so it’s important to find out whether a study uses a source of Se cations, like Se chloride or a source of Se anions, like sodium selenate. If you want to reproduce the results you will need to match the exact source used, as using a different source can lead up to completely different results. Most studies focusing on Se use it in concentrations around 0.1 to 0.5ppm, although some studies do go as far as 5-10ppm, especially when studying the effects of the salts where Se is present as a cation.

Although most studies related to Se focus on the fortification of fruits, many studies also measure yield and plant quality related parameters in order to obtain as much information as possible. In this study of Se used in tomato plants there was a substantial enrichment of Se and a delayed ripening but there were no substantial effect on plant growth. However post-harvest characteristics of fruits were significantly improved by Se. Other studies on tomatoes, like this one, have however found improvements in yields when using Se.

Other studies like this one on curly endive or this one using Se nanoparticles in pomegranate, do show significant improvements in plant characteristics from using Se. In the pomegranate study, an 1.35 fold increase in the number of fruits was achieved, a very impressive mark given the characteristics of the treatment.

Table taken from this review article

Selenium can also be a defense against temperature and salt stress. This article on peppers shows that an application of foliar selenium can help reduce flower drop rates and other adverse effects of temperature stress in these plants. This article on wheat seedlings, shows that selenium can also be protective against salt induced stress, preserving root growth under these adverse conditions.

It is also worth considering that Se can also become toxic to plants at anything but low concentrations. This review, which goes significantly into the articles that had been published up until 2014, goes deeply into this particular issue. The table above is particularly useful, as it shows the ranges of applications and toxicities for some plants. It is within the conclusions of the above review – as we have seen in the articles shown before as well – that Se can be used as an effective additive, stress protector and growth promoter when used in adequate amounts and forms (remember, cationic and anionic forms are different!), while it can become toxic and damaging if used without care.


Five ways to save money in hydroponics

Commercial hydroponics can be extremely expensive, given the technological complexity and supplies required for a successful crop. The biggest costs are usually related with the initial setup but subsequent crops can also become very expensive, especially if you are using boutique fertilizers or additives that can get very expensive very quickly. Today I want to talk about five ways in which you can save money in a hydroponic crop from a crop-cycle perspective.

Avoid buying liquid concentrates as fertilizers. Liquid fertilizers have some intrinsic advantages – like their homogeneity – but they contain a lot of water, which means that you will need to ship more than one pound of water for every pound of fertilizer you get. This will increase the cost of the fertilizer significantly, even if you’re buying fertilizers in bulk for a commercial crop. When buying single bulk or blended fertilizers make sure you always buy solids to greatly save on these costs.

Prepare your own blend of fertilizers for macro nutrients. The most complicated part of fertilizer preparation usually deals with the micronutrient portion of fertilizers, if you want to be as simple and cost efficient as possible you can actually buy this portion – some companies specifically sell the micro part – and then prepare all the macro fertilizer blends yourself. You can then hire a consultant or read the scientific literature to get a formulation you can then use to prepare your macro portion from bulk commercially available fertilizers (which are extremely cheap).

Prepare your own foliar treatments. Foliar spraying can greatly reduce problems and increase crop yields, so it is usually a no-brainer to make sure you use foliar sprays within your crop cycle. Some of these foliar additives can be very expensive though, but it can be very cheap for you to prepare your own additives if you have the proper know-how.

Use a recirculating nutrient system. Drain-to-waste nutrient setups are extremely wasteful. If you want to have a crop that is as cheap to run as possible you will need to go to a proper recirculating setup. Once you do this you will be able to use your recirculating solutions for weeks before having to carry out a nutrient change and, even then, there are some techniques that might allow you to keep your nutrient solution for even longer. Imagine if you only needed to prepare/change nutrients once every blue moon.

Make sure you use silicon additives. Many growers fail to use silicate containing additives within their crops and generally suffer from a far greater chance of having losses due to fungi. Potassium silicate is extremely cheap and with it you can make your own silicon containing additive that you can use to greatly fortify your crop against fungal disease. A small additional expense can save you a lot of loss and heartache down the line. You can a save a lot of money by avoiding commercial hydroponic silicate products and instead making your own silicate additive yourself from potassium silicate.

When implemented, the above changes can help a commercial operation save tens to hundreds of thousands of dollars per year in nutrients, additives and crop losses. Even only implementing a couple of the above can help a mid sized operation save a ton of money in just fertilizer if, for example, in-house macro fertilizers are used, or if a recirculating system with proper nutrient management is established.

Of course, the above steps are not trivial so I would recommend anyone attempting to do them for the first time to get someone with experience in the hydroponic industry to guide their hand through the process. That could either be me or any other highly experienced consultant in the field of commercial hydroponic growing and nutrients management. If you have enough time and the inclination to do so you could also try to learn the above things yourself from scientific literature and online resources, but if you choose to do so I would advice you try to implement what you learn in smaller crops before scaling to larger projects.


Calcium’s behavior in hydroponics

Calcium is often one of the most puzzling elements in hydroponic culture due to its ability to respond fairly non-linearly to nutrient concentrations in solution. This behavior is the result of its transport dynamics and its relationship to other elements that may antagonize it very effectively when they reach higher concentrations. On today’s post I will talk about calcium behavior in hydroponics and how we can play with both environmental and chemical properties to change its concentration in leaf tissue.

A leaf showing symptoms of a calcium deficiency. This is usually NOT caused by a lack of calcium in the nutrient solution.

Imagine you’ve had a good growing season up until now, your plants are looking great, you’ve been doing everything properly. Suddenly, you start to see what appears to be a calcium deficiency on your leaves. You proceed to analyze your tissue and notice that your Ca levels are way below what you expect, yet your nutrient solution seems to be very Ca rich, at almost 150-200 ppm. You panic and increase the Ca level to 250 ppm, your following test results come out even lower. You’re not alone, you’ve just misunderstood calcium transport.

Most calcium deficiencies are actually not the result of Ca missing in nutrient solutions but they are caused by faulty Ca transport, which is often related with environmental issues. Calcium transport depends substantially on transpiration, so the solution to Ca deficiencies can be as simple as increasing your vapor pressure deficit (VPD). Ca is also absorbed more effectively when its at a lower concentration than at a higher one, so often increasing Ca will decrease its transport to leaf tissue. This study on tulips and its bibliography illustrates this fairly well, the increase in tissue with Ca follows a parabolic trajectory, where the largest Ca concentrations actually lead to lower Ca in tissue. You can push Ca to the leaves with higher VPD though, as this paper on Ca fortified lettuce shows, with the lettuce grown at Ca at 300ppm at 28C showing the highest Ca accumulation.

Taken from this article. It shows that terpenes can increase at larger Ca content in tissue in some flowering plants.

At lower levels Ca can actually start to show the inverse behavior and start to accumulate very heavily in tissue as its transport can become extremely favorable. If you notice a large increase of Ca in your leaf tissue at your plants ideal VPD then you might actually want to increase Ca in solution rather than decrease it, as an increased concentration in solution might actually make transport less favorable. However the most determinant factor in Ca absorption is water transport, so this excessive Ca might just be indicating you that your VPD is too high (so reduce temperature or increase your relative humidity).

This big influence of VPD explains why results of ideal Ca concentrations and Ca:K ratios are significantly disperse in the scientific literature. A recent paper for strawberries shows this ideal ratio to be around 1.3-1.4 but some papers (like the one on tulips shown before or this one) has it way closer to 1.0. The ideal ratio for your crop will also be dependent on the water transport your plants are forced to assume due to your ambient conditions so you will likely need to optimize this variable for your particular growing conditions.

A good place to start for flowering plants in terms of K:Ca is usually a ratio of around 1.2 however, you will need to do tissue analysis to figure out whether the Ca absorption is at the ideal point or whether you want to increase/decrease your Ca. Just bear in mind that increasing Ca in solution might reduce it in your leaf tissue so to reduce Ca in tissue try to play with your VPD first before you play with the concentrations in solution. Chances are that if you’re getting too much or too little your issue is that you’re too deviated from your ideal VPD situation.


Five things you should know when mixing your own hydroponic liquid nutrients

Many hydroponic growers – especially large scale ones – can benefit greatly from mixing their own custom nutrients. Not only can this save money in the thousands of dollars per month but it can also give you an unprecedented degree of control when compared with store-bought nutrients. On today’s post I am going to write about five important things you should know when mixing your own nutrients so you can avoid many common problems that can arise when you start preparing your own stock solutions.

More concentrated solutions are not always better. When you prepare a concentrated liquid you would usually want to go with the highest possible concentration factor so that you can prepare as much final nutrient solution as possible with as little stock solution as possible. However trying to get into higher concentration factors (1:400-1:500) can cause important issues due to the solubility of the salts used and the temperatures the stock solution will be exposed to. It can also cause high inaccuracies with variable injector setups since the dilutions will be much smaller. For starters go with a 1:100 concentration factor and only start going higher when you get more experience. If you’re using injectors I would generally avoid a range higher than 1:250 unless you do more extensive calibration procedures with your injectors.

Impurities can cause important problems. Some salts can come with significant levels of impurities – sometimes mainly additives – that can cause substantial issues when preparing your nutrient solutions. Lower quality grade salts – mainly those used for soil fertilization or those that are OMRI listed and come straight from mining with no refining – can generate problems within your mixing process. These problems range from insoluble left-overs in tanks to toxic amounts of some micro elements. To ensure you get the best possible results use greenhouse grade fertilizer salts and try to avoid sources of salts that are OMRI listed. Synthetic sources that have been heavily purified are your best bet in ensuring the best possible results.

Use slightly acidic deionized water to prepare the solutions. Most water sources in Europe and the US are very heavy in carbonates an therefore inappropriate for the preparation of concentrated nutrient solutions as these ions can cause salts to precipitate when preparing concentrated solutions. To fix this issue the best thing would be to use distilled water but – since this is often not an option – the next best thing is to use reverse osmosis water and add a bit of acid (0.5mL/L of nitric acid, other acids may cause other problems) per gallon of concentrated solution. This will ensure that everything gets dissolved and will eliminate the carbonates that can be naturally present within the water. Of course never, ever use tap or well water to prepare concentrated hydroponic solutions.

Salts take up volume, take that into account. A very common mistake when preparing solutions is to just add the salts to the final volume of desired stock solution to prepare. This is a mistake since the salts also take up volume. If you want to prepare 1 liter of concentrated solution and you need to add say, 100 g of potassium nitrate,  adding 100g of potassium nitrate to 1L of water would generate a solution with a final volume greater than 1L. To avoid this problem always add the salts to half the volume of water and, after the salts have dissolved, complete to the final volume of desired solution.

Add salts from the smallest to the largest quantities. When you prepare hydroponic solutions it is often better – especially when you’re starting – to add salts from the smallest to the highest amounts needed. If you make a mistake at some point then you will minimize the amount of mass of salts that has been wasted due to this fact. If you make a mistake adding a micro nutrient you will only lose a small amount of the other micro nutrients instead of losing a huge amounts of macro nutrients due your order of addition. It is also true that the substances that are added in largest quantities are commonly  nitrates and these salts have endothermic dissolutions – meaning they cool solutions upon addition – so it is better to add them last so that they can benefit a bit from the heat generated by the dissolution of the other salts.

The above is not an exhaustive list of pointers but it should save you from some important trouble when preparing your own initial nutrient solutions.Although some of these points may seem obvious to those that have experience preparing their own solutions they may prove invaluable to those who are just starting their journey in concentrated nutrient preparation.