Comparing the conductivity of two different solutions

Conductivity is perhaps the most misunderstood and erroneously used measurement in hydroponic culture. This has a lot to do with conductivity also being called a “totally dissolved solid” (TDS) measurement and the conductivity scale being expressed in “ppm” units, concentration units which only cause confusion in this area. Today I want to talk about an important consequence of this confusion that happens when you try to compare the conductivity of different nutrient solutions. I’ll talk about a recent case I encountered and how it generated significant problems due to a natural misunderstanding of how conductivity works.

A grower wanted to run a side by side trial of two nutrient formulations using identical growing conditions. This grower then decided that the best way to do this was to ensure that the conductivity and pH of the two solutions were identical after preparing the nutrient solutions, then they would both be equivalent in terms of their strength and differences in results would be entirely due to the differences in ionic ratios between both of them. The media was the same, the environment was the same and plant genetics were the same.

However there was a small problem with this thinking. The same conductivity across two different solutions is not the same thing. You might think that using a conductivity of 2.0 mS/cm across two different nutrient solutions might mean that their “strength” is the same, but in reality the strength of a solution – as per what a plant really experiences – is determined by its osmotic pressure and osmotic pressure – although proportional to conductivity within the same solution – cannot be extrapolated when the composition of the solution changes. This confusion is further expanded when people see the conductivity numbers in ppm because the expression in mg/L makes them think there is the same “amount of stuff” in the two solutions. This is not the case.

All the ppm does is tell you that your solution has the same conductivity as a reference with that ppm concentration (commonly NaCl or KCl) but it tells you nothing about how many dissolved solids are really present within your nutrient solution. Given that non-conductive substances also affect the osmotic pressure of a solution it can happen that a nutrient solution with the same conductivity as another one in reality has a lot more dissolved solids, making it far more concentrated in real terms compared to the other one.

In the above mentioned particular case one solution had a chelating agent that effectively made a significant number of ions neutral in charge (effectively making them non-conductive) reducing the measured conductivity by around 20% at the same osmotic pressure as the other solution. So while the grower was feeding the two solutions at the exact same conductivity, the second solution was around 20% more concentrated in real terms – osmotic pressure terms – compared to the other one. Plants responded very negatively to this – as the conductivity was already quite high – so the grower erroneously assumed that this was due to the ionic ratios instead of it simply being due to an error in judging concentrations. The second solution was a lot stronger in real terms, although the conductivity was the same.

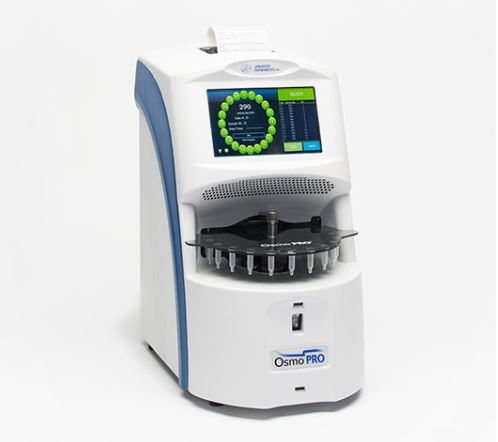
When comparing two nutrient solutions you should therefore resort to measurements different than conductivity because the conductivity of two different solutions with different ion compositions cannot be compared, the same level of conductivity will result in two completely different osmotic pressure values. Their strengths will not be the same. If you want to compare two different solutions at the same real strength then you need to use an osmometer to determine this point and sadly osmometers are neither cheap nor practical to use.

However another possibility is to simply compare at a constant concentration of a given element. Have a lab analysis of the two fertilizers made – remember you cannot trust labels to give you the real composition values – calculate how much of a given element, for example N, is present at a given application rate and then dial in the other fertilizer to match that N concentration. The osmotic pressures will probably be different but at least under this sort of A/B test you will be comparing apples to apples in the sense that the only variable will be the N:X ionic ratios between the two solutions. Total strengths will differ but this will be due to differences in ionic ratios, which is probably what you want to test.


Probes for constant immersion in hydroponic nutrient solutions

If you have a hydroponic crop then you probably have to measure and monitor the pH and EC of your nutrient solutions. This means taking probes out of storage, ensuring they are calibrated and then carrying out measurements. This process can be very inconvenient, reason why growers might prefer to carry it out less often, even if this means they will have a lot less data. However there are several solutions that can enable constant monitoring of hydroponic nutrient solutions without the need to constantly take out, calibrate and then store away probes. Today we will talk about why regular probes are not suited for this and what types of probes are needed if you want to do this.

Usually low quality EC/pH pens cannot be kept within nutrient solutions because they are not built to withstand constant contact with nutrient solutions. This is both due to the electrode composition – the actual glass or metal electrodes not being robust enough – and the actual junctions and other components not withstanding the nutrient solution as well. Although hydroponic nutrient solutions are not particularly harsh environments – with a slightly acidic pH and moderate ionic strengths – probes for constant monitoring of nutrient solutions must be designed with constant immersion in mind.

For constant monitoring of pH in nutrient solution tanks you want a proper submersible electrode assembly like this one. These electrodes are usually mounted on PVC fixtures and can be easily mounted on tanks to provide constant readings for the nutrient solution. The electrode comes with a standard BNC connector meaning that it is compatible with a wide variety of pH controllers. If you don’t want to mount it on the tank but you just want the electrode to be like a normal probe but constantly submerged then you can use something like this industrial probe which comes with a pH controller as well that can be used with any other probes you purchased and interfaces with an arduino or raspberry pi to get and store readings. For probes like this last one I usually wrap the entire outside body of the probe in electrical tape to give further strength to the probe/cable junction.

For conductivity readings you will want to go with electrode-less EC probes (like these ones) which over PVC mountings as well with the advantage that they do not suffer from polarization issues – like normal EC pens use – so they lose calibration much more rarely and can give much more accurate readings across a wide range of different solution types and conductivity values.

For the grower who wants it all there are also probes like the Mark I-A probe which is a tank-mounted probe assembly that does EC, pH and ORP readings, all in one single fixture. This is incredibly practical since it is able to implement all the readings you need in one single fixture. The problem of course is that calibration of any reading requires you to remove all three sensors so this can be a bit inconvenient when you want to ensure that any of the readings are indeed accurate.

Of course submersible robust probes are more expensive but they are much more convenient. They get damaged much less frequently, require much less maintenance, provide constant readings and need to be calibrated only a few times a year. For example the industrial EC and pH probes I use in my home hydroponic setup have only required calibration once a year, even then the loss in calibration was only around 0.2 units for the pH sensor and 0.3 mS/cm for the EC one so I probably could have continued using the probes without calibrating them for 2 years without having to face any dramatic consequences. If you spend 300-400 USD on high quality robust probes you will probably have them for much longer, with far more accurate results along the way.


How to prepare your own solutions for EC meter calibration

On a recent post I talked about how you can prepare your own solutions for the calibration of your pH meter. However hydroponic growers not only need to calibrate their pH meters but they also need to use EC meters to control their growing environment. Today I want to talk about how you too can prepare solutions for the calibration of your EC meter so that you don’t need to depend on expensive commercially prepared solutions for EC calibration. I will also give you some important tips about how to maintain these solutions so that they last for a longer time period.

As in the case of pH meters the correct calibration of an EC meter ideally requires the use of two solutions. Most people however use only one solution or use two solutions in a rather wide range. Ideally both solutions would need to be within the range in which we would want to measure so ideally we would want to have solutions in the 0.5-3.0 ms/cm range for the calibration of an EC meter used in hydroponic. We also need to make sure we use substances that show both a linear relationship between EC and concentration and that do not affect the pH of the solution considerably as the EC can also vary significantly with the pH of a solution.

As in the case of pH meters the easiest – but definitely not most analytically correct – way to carry out this preparation is to work with a calibrated EC meter to start with. In order to do this buy a single calibration solution so that you can ensure that your EC meter is at least calibrated properly over a single point. After the EC meter is calibrated we will use it to prepare a calibration solution with a specific EC level that we can then use for calibration. Since there is nothing special about any specific EC points – not the same case as with pH electrodes where pH 7 is the electrodes isoelectric point – preparing EC calibration solutions is easier.

Start with a water source – distilled would be preferred – and add around 1g per liter of NaCl, you can use any store-bought variety to carry out this process (the small amounts of additives won’t affect this process significantly). This should give you a conductivity reading in the range that is generally used in hydroponics, depending on your tap water it should be somewhere between 1.5-2.5 mS/cm. You can also prepare another solution with 0.5g per liter of NaCl which should allow you to perform a two solution calibration. Note that the addition values do not need to be exact. If you are using tap water make sure you let it sit for around a day before using it so that any chlorine is eliminated from the water.

After preparing the solutions take note of their EC levels, these are the levels you will use for calibration. A problem with EC solutions is that they have a fundamental dependence on the concentration of ions in solution and cannot compensate for this so the EC values will vary and become unknown if you let the solutions evaporate. When storing EC solutions it is therefore important to use airtight containers and additionally put electrical tape around the cap after every use, this will make sure that the loss of ions within the bottle is minimal. After some volume of solution is used make sure you discard it and never put it back inside the same bottle.

As in the case of pH meter calibration solution preparation this is definitely not the way in which these solutions would be prepared in a lab – as you can prepare solutions with extremely accurate predicted conductivity if you have very pure salts and double distilled water – but it’s a very good way to create cheap calibration solutions that offer low enough errors to allow for their use in hydroponic culture.