The best cheap sensor setup for relative humidity in hydroponic automation projects

I have written in the past about humidity in hydroponics, especially how accurately measuring humidity is hard due to problems with the sensors. In my experience during the past 5 years with different humidity sensors in Arduino based automation projects I have tried different chipsets and have now reached a conclusion about my preferred chipset setup for the measurement of humidity in hydroponics. Today I want to share with you my experience with different sensors, what I think the best overall setup is and where you can buy breakout boards that use these chipsets to use them in your projects.

One of my favorite sensors for the measurement of relative humidity in hydroponics

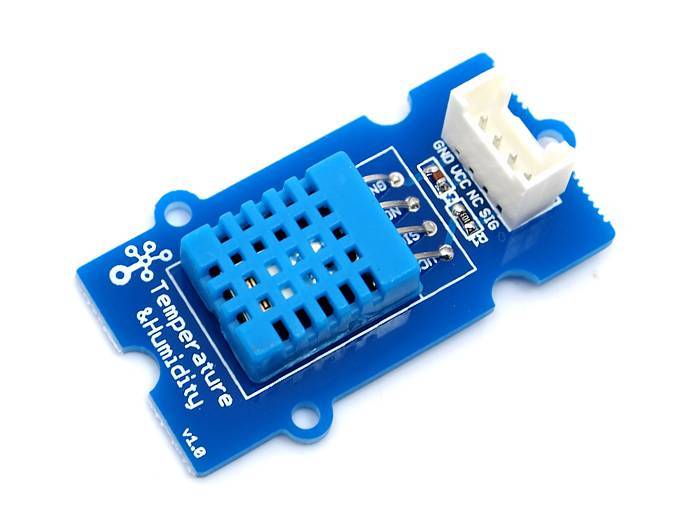
The first sensors I ever tried for measuring humidity in hydroponics where the DHT11 sensors which are the cheapest but have really poor accuracyand limited range. I then moved to the DHT22 sensors (also known as AM2302 sensors) which in theory have an accuracy of +/-3% but I had a lot of problems with the sensors dying on me as a function time, this was particularly the case when the sensors were places near plant canopy, where they could be exposed to much higher levels of humidity than those placed to measure overall room humidity values. We also tried using them in a commercial tomato greenhouse and the sensors placed near canopy failed miserably after only a couple of months. More infuriatingly, the sensors that did not outright die seem to have lost a lot of their sensibility, with increased hysteresis in their measurements as humidity changed through the days.

This table of properties was taken from this website.

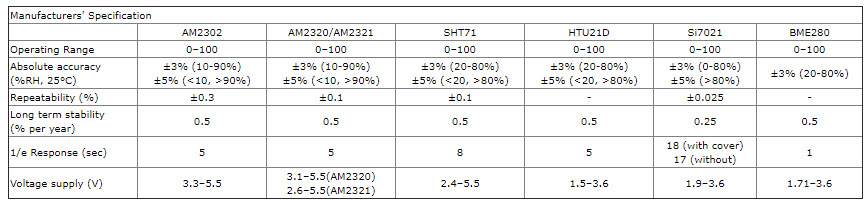
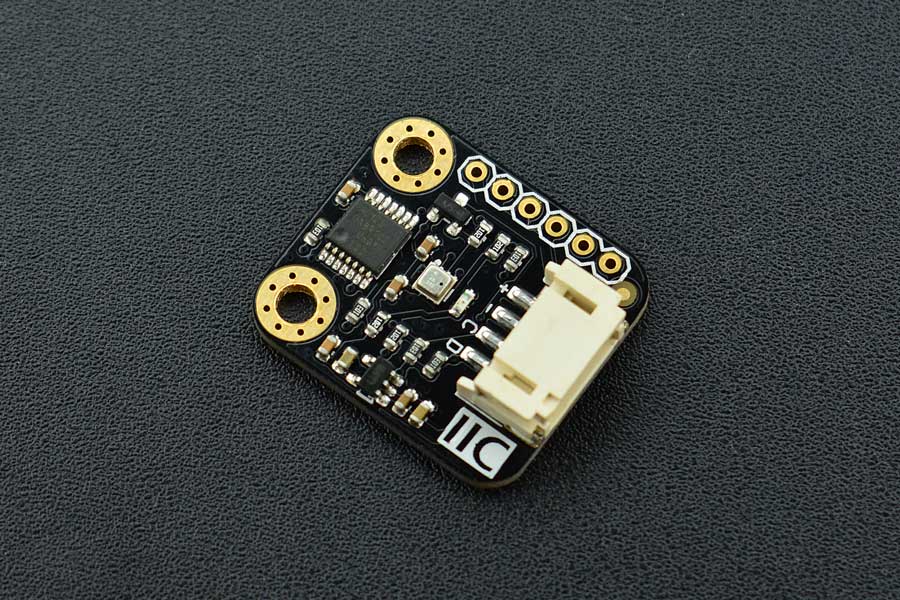
I then moved to the SHT1x humidity sensors – which were much better and more reliable – and these sensors became my go-to sensors for around a year. However I was increasingly concerned about problems with systematic errors, since all these sensors use a capacitive technique to measure relative humidity, so I decided to try other sensors that used different measuring methods. The only cheap sensor I could find using an alternative measuring technique was the BME280 – released within the last two years – which turned out to be a very reliable sensor. My default setup for measuring humidity has now become a 2 sensor setup where I connect one SHT1x and one BME280 sensor board to an Arduino and then make sure both sensors are within 2% to take a value or issue a control action. If the deviation between both sensors is above 2% then I make sure to be notified about it so that I can see if there is any problem with either of them. I was happy to learn that my conclusions are also supported by other people who have systematically evaluated humidity sensors.

Although I usually prefer the sensors from dfrobot for regular builds, as they are easier to use, you can find breakout boards or more elaborately packaged sensors with these chipsets at other places. In particular I have found the mesh protected SHT-10 sensor from Adafruit to be particularly useful for more demanding environments (like canopy, greenhouses or just outdoor sensing) which might be suitable for those of you looking for a significantly more robust solution to measure humidity, even if at a higher price. Adafruit also carries low cost breakout boards for the BME280 and the SHT-31D, which is a more accurate chip of the SHT family. In any case, I wouldn’t bother with the AM family of sensors, as they have proven to be less reliable than the above mentioned counterparts.

Last but not least, please make sure to contact me if you’re interested in getting my help or input to build a custom made sensing setup for your hydroponic facilities. Having wireless sensing and controls, all integrated into a centralized sensing unit, is perhaps one of the best ways to get reliable real-time data and enhance the control and decision making processes within your hydroponic facility.


Calibrating your digital humidity sensors

On a recent post I talked about vapor pressure deficit and its importance in hydroponic culture. To adequately control VPD it’s necessary to accurately measure relative humidity and in order to do so it’s necessary to have adequately calibrated humidity sensors. Since most of today’s humidity sensors are digital this becomes even more important as these sensors can get damaged very easily, especially if the dew point is reached at any given point in time. Today I am going to talk about humidity sensor calibration, how it can be easily carried out and why you should do it in order to ensure that your humidity sensors are being accurate enough for your cultivation needs.

Most modern digital humidity sensors are based on conductive polymers whose resistance changes with the amount of water in the air. If the polymer is in equilibrium with water vapor in the air then this change will be proportional to relative humidity. Sensors like those from the SHTX and DHTX series work using this principle. However if the polymer gets wet – water falls on the sensor or the dew point is reached – or if it faces very low humidity conditions for a long time then the humidity sensor will stop working correctly and it will need to be reconditioned and calibrated.

Reconditioning of these sensors is usually carried out by exposing the sensor to higher temperature dry conditions and then exposing the sensor to a controlled higher humidity lower temperature environment. These are some typical instructions for humidity sensor reconditioning. Once this process is carried out the sensor is now ready to be calibrated. Depending on the sensor you’re using you might be able to change some calibration parameters to adjust the sensor to changes in its response or you might just use the calibration procedure to check the sensor’s accuracy and discard it if it isn’t behaving properly.

Calibration of digital humidity sensors can be carried out by putting them in the atmosphere composition generated over a saturated solution of a given salt. This table shows the expected relative humidity values at different temperatures for different salts. Basically you want to use a glass container where you can prepare a solution that has so much salt that there are undissolved crystals within it and then place your sensor in a closed environment above this solution (without touching it!). You can achieve this by drilling a hole at the top of a container with a lid to place the sensor (like it’s showed here), alternatively you can stick the sensor with electrical tape inside a glass and then place it upside down in a small amount of solution. This last process – first image in this post – completely eliminates any issues caused by potential holes and the atmosphere reaches equilibrium a bit faster. Another potential option is to create a paste with water and salt and place this past with the sensor inside a zip lock bag.

For starters you can perform a single measurement with a saturated sodium chloride solution – which should give you a humidity of around 75%. This is a good way to check if the sensor is working properly without the need to buy any additional materials. If you want you can then get some additional salts, like potassium chloride, magnesium nitrate and potassium nitrate, which should give you several different calibration points to draw an appropriate calibration curve to gauge how your sensor is working across the entire humidity range. Ideally you would want to have two salts with equilibrium points above 50% and two below 50% relative humidity.


Vapor pressure deficit (VPD) in hydroponics

If you have read books or articles about greenhouse environmental control you have probably heard about Vapor Pressure Deficit, also known as VPD. This is an important variable to measure as it helps us understand the conditions our plants are facing, gauge their water use and even predict whether we will be getting better or worse yields. Today I am going to talk about vapor pressure deficit in hydroponics, what this variable means, what it takes to control it and why it is so important to understand and even change this value to obtain better results.

Vapor pressure deficit – measured in kPa – basically measures how much water vapor pressure we would need to put into a room with a certain humidity and temperature to get it to the point where relative humidity would be 100%. The larger the VPD the more water you need to put into the air to get it to saturate while the lower the VPD the closer the air is to full saturation. Since air holds more water with increasing temperature this means that at a fixed relative humidity the VPD is directly proportional to the room’s temperature. This simply means that the hotter the room, the higher the VPD and the colder the room, the smaller the VPD if humidity remains constant.

The problem with a very low VPD – room close to 100% humidity – is two fold. First, it’s difficult for any organism to evaporate water and second, it’s easy for water to condense on any surface it temperature drops just a bit. For humans this basically means having to wear a t-shirt soaked with your own sweat but for plants this means both an inability to cool their surfaces and an inability to transport nutrients to their leaves. A low VPD generates a lot of stress because it makes plants unable to properly transport water.

A high VPD is equally problematic as it means that the plants need to transpire a lot. If air can hold a lot of additional water vapor this means that plants will lose more water through their stomata and this permanent loss puts pressure on the roots to transport more and more water. If root mass is not large enough or water availability is not high enough then plants will face important problems and will simply tend to wilt as the air takes away more water than what the plant can effectively transport through its tissues. You can actually often create models using VPD to predict a crop’s water usage (see image below).

The first graph in this post (which I took from this study on tomatoes) shows the optimum VPD – in green – as a function of humidity and temperature for greenhouse production of tomatoes. In general a range between 0.5 and 1.1 seems to work best but the window under which these conditions are possible becomes narrower as temperature increases. Ideally we would want to be somewhere around 20-25°C where we should sustain humidity values between 65-70%. This would give us a VPD value between 0.7-0.8 which is around what is commonly held to be most beneficial for greenhouse crops under normal conditions.

However optimal VPD can also change depending on lighting conditions and other sources of supplementation. For example the optimal VPD during the day is usually higher than the optimal VPD during the night. In general it’s better to have a drop in VPD during the night relative to the VPD that is maintained during the day. Declines in canopy carbon dioxide exchange rates can be correlated with increases in the VPD during this time (see here for a study about this on soy bean). If you’re supplementing carbon dioxide – which puts further transpiration stress on the plants – the optimal VPD is also likely to be lower than if you didn’t use any supplementation at all (you can see a practical application of this here).

Changing the VPD can be a challenge but under closed environments it is much easier to do. You can reduce the humidity using a dehumidifier to increase your VPD and you can use a humidifier to increase your VPD. Ideally you will want to use an AC unit to keep your temperature at exactly the value you want it to be and you can then use a humidifier/dehumidifier to control the exact point where you want your VPD to be by controlling the value of your relative humidity at the fixed temperature provided by the AC unit.