Coco Coir vs Rockwool in Soilless Crops
Choosing the right substrate is critical in greenhouse hydroponics. Coconut coir (coco peat) has become a renewable alternative to rockwool, and recent studies show it can match or exceed rockwool in many crops. In cucumbers, switching to coir improved leaf area and marketable yield (1). In tomatoes, coir supported higher fruit yield and nutrient uptake than rockwool (2). In leafy greens, lettuce in coco peat produced more biomass than mineral wool or perlite in controlled greenhouse trials (3). Even strawberries have shown equal or better performance in coir compared to rockwool when root-zone aeration is properly managed (4).
- Tomato: Coir gave higher yields and heavier fruits than rockwool. Plants on coir had significantly greater uptake of potassium and sulfur, translating to larger fruit and more total yield (2).
- Cucumber: Coir boosted growth and yield compared to rockwool. Leaf area index and final yield were consistently higher on coir (1).
- Lettuce: Coco peat produced ~40% higher leaf biomass than perlite and ~70% higher than mineral wool in one ebb-and-flow greenhouse study (3). In another greenhouse system, rockwool gave the heaviest fresh biomass, but coir produced taller plants and longer roots (5).
- Strawberries: Over six months of pot cultivation, strawberries grown in coir matched or outperformed rockwool in shoot dry weight, while showing more stable drainage EC and pH (4). Extension reports and grower trials further suggest blends of coir with perlite improve aeration and flowering compared to pure coir (6).
Crop Comparison Table
| Crop | Rockwool Yield | Coco Coir Yield | Notes/Ref |
|---|---|---|---|
| Tomato | Lower | Higher (2) | Heavier fruit, greater K and S uptake |
| Cucumber | Lower | Higher (1) | Higher LAI, yield, nutrient levels |
| Lettuce | Moderate | Higher (3) (5) | Coco peat surpassed mineral wool in one study; rockwool still led in fresh biomass in another |
| Strawberry | Variable | Equal or higher (4) (6) | Coir stable for EC/pH; blends improve aeration |
Tomatoes on Coir vs Rockwool
In the tomato trial by Xiong et al., coir substrates significantly outperformed rockwool. Plants in coir had higher total fruit yield, greater average fruit weight, and better uptake of key nutrients such as K and S (2). This demonstrates that coir is not just a substitute but a potentially superior medium for greenhouse tomato production.
Cucumbers on Coir vs Rockwool
In greenhouse cucumbers, coir consistently gave higher vegetative vigor and fruit yield. Leaf area index and final yields were significantly higher than on rockwool (1). Nutrient analysis also showed higher Ca, Mg, and Zn contents in coir-grown plants, suggesting coir buffers nutrients more effectively.
Lettuce and Leafy Greens
In Polish greenhouse trials, coco peat lettuce heads produced substantially more leaf biomass than those grown in mineral wool or perlite (3). In contrast, a Philippine hydroponic study found rockwool produced the heaviest fresh biomass, but coco coir gave taller plants and longer roots (5). Together, these results show coir can rival or surpass rockwool, but outcomes depend on system design and cultivar.
Strawberries on Coir vs Rockwool
In Korea, a six-month hydroponic strawberry trial showed that coir matched or outperformed rockwool in shoot dry weight, while maintaining more stable EC and pH in drainage solutions (4). Practical experience also suggests that coir blended with perlite is best for strawberries, as it improves root aeration and prevents waterlogging (6). For crops that have roots that require high oxygenation, perlite amendments are fundamental to the use of coco coir for optimum results.
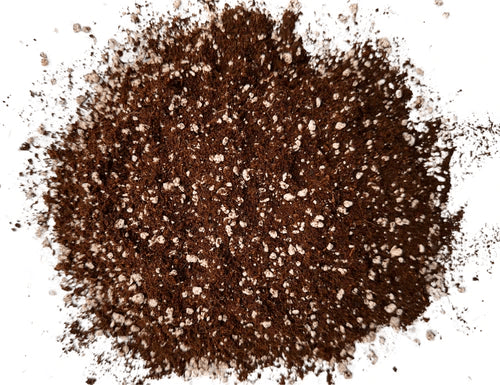
Coco/Perlite Blends
Many growers prefer mixing coir with perlite to improve aeration. This is especially useful for crops like strawberry, which are sensitive to low oxygen in the root zone. A 70:30 coir:perlite ratio is widely used to combine coir’s nutrient buffering with perlite’s porosity. These blends often outperform pure rockwool in practice.
Summary
Greenhouse research consistently shows that coir is a strong alternative to rockwool. Tomatoes and cucumbers perform better on coir, lettuce often produces more biomass, and strawberries grow well provided aeration is managed. Coco/perlite blends add further reliability. For growers aiming to reduce reliance on rockwool, coir and its blends represent a proven, effective option that can sustain or increase yields while offering better root-zone stability.