A new conductivity model in HydroBuddy
On my previous post you can read about how I ran experiments to develop a conductivity model using empirical data in order to improve our ability to predict EC values from the concentration of individual nutrients in a hydroponic nutrient solution. In this post I will now talk about how this was finally implemented in HydroBuddy, what form it took and what kind of result can be expected from it. The implementation discussed in this post has already been updated to the HydroBuddy github along with all the experimental data used to derive this empirical EC model.
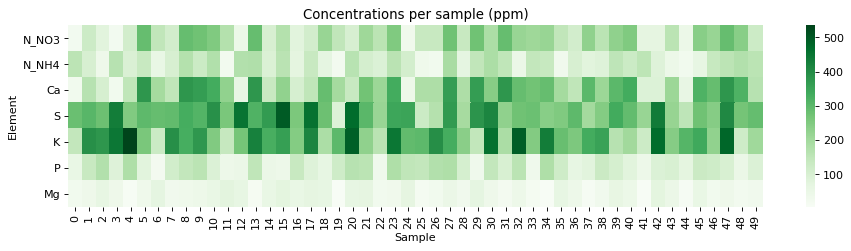
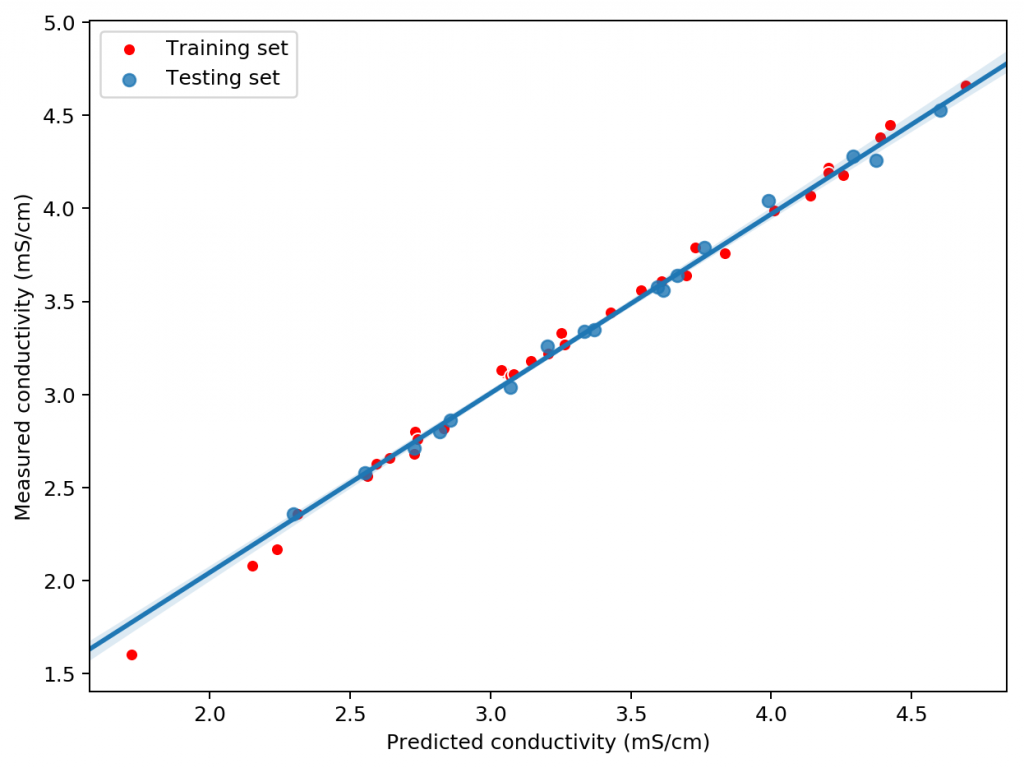
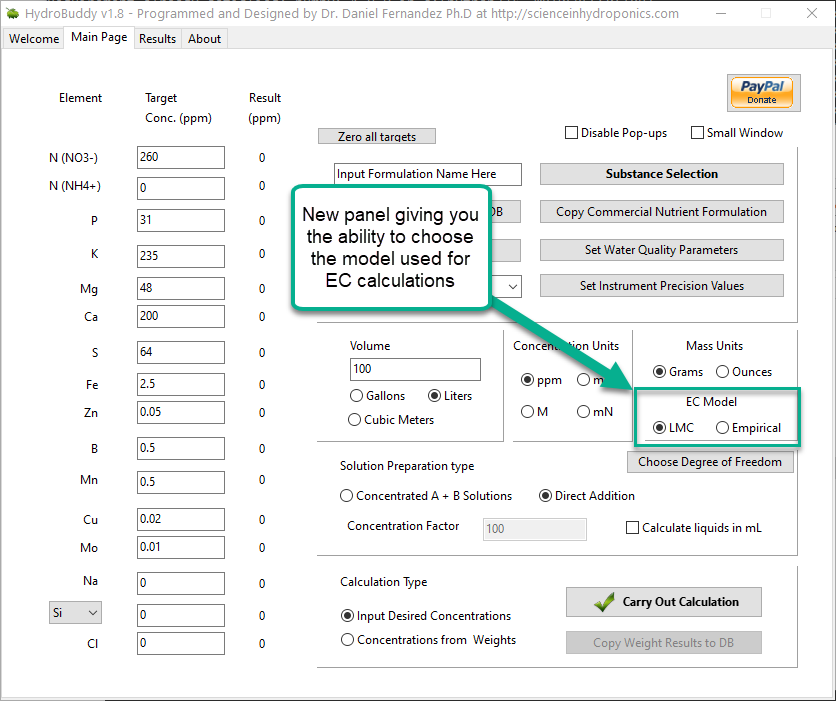
Given the amount of data and the nature of the problem at hand, the easiest and most accurate way to build a model was to use a simple linear regression algorithm. As previously shown this model was able to give great results within the data, even when performing random training and testing splits. I have added a jupyter notebook to the github repository, along with all the data we measured in order to allow you to see how all the calculations were done, how the model was created and the sort of accuracy the model got within the set of experimental results. You can also play with this notebook to develop your own models or analyse the data any further if you wish. You can also try to reproduce our experiments and help verify our results. The linear model was translated into FreePascal and added to HydroBuddy although the program still retains the ability to estimate conductivity using the previously available LMC based model.
The fact that we were able to create a model to accurately determine conductivity within this experimental space does not mean that this model will work to magically determine the conductivity of any hydroponic formulation. These experiments were designed using five salts – calcium ammonium nitrate, ammonium sulfate, potassium sulfate, magnesium sulfate and monopotassium phosphate – which means that although our model is able to greatly describe conductivity in this space, the model is likely to run into trouble when attempting to describe a space that deviates too strongly from the one described above. This will be most evident whenever there are some cations or anions that are not present at all within these experiments. For example when silicates, chlorides or other such salts are used or when strong acids or bases are added to the solution.
Another important issue is the way these ions are paired. In our experimental process the concentration of Ca and N as nitrate always increased at the same time, meaning that the linear model implicitly carries this assumption. A setup were magnesium nitrate or potassium nitrate are used as well, will contain deviations from the current model that it is likely not very well prepared to deal with. A similar problem might happen when salts such as ammonium monobasic phosphate are used, since our model only contained a single example of a phosphate salt (monopotassium phosphate). While it is not easy to predict how much accuracy will be lost in these cases, we do expect the model to be significantly more inaccurate as other salts are used.
Additionally, our experimental setup did not contain any corrections of pH values, so the conductivity values described include a pH drift related with the amount of acid contributed by the potassium monobasic phosphate, which was not neutralized by a base. This will also cause differences with conductivity, if the conductivity is measured after the pH of the solution is corrected to the proper range used within the hydroponic process. Although at the concentration values used in hydroponics this should not be a big issue, it is still something worth considering.
As I mentioned above, the model is already implemented within the github repository – if you want to compile the program yourself – but the binaries won’t be updated to v1.8 until later this week. I look forward to your feedback about the model and hope it can help – at least some of you – to dramatically improve the estimations of conductivity of your hydroponic nutrient solutions.